개요
Imgly란?
Imgly는 PhotoEditor, VideoEditor, CreativeEditor 를 Android Native, Flutter, Ionic, React Native, iOS 등 여러 플랫폼을 대상으로 지원해준다.
현재 글에서는 Imgly의 VideoEditor를 적용하고 기능과 UI를 Customize 하는 것을 설명한다.
주요 기능
사진과 동영상에 대해 다음과 같은 기능들을 제공해 준다.
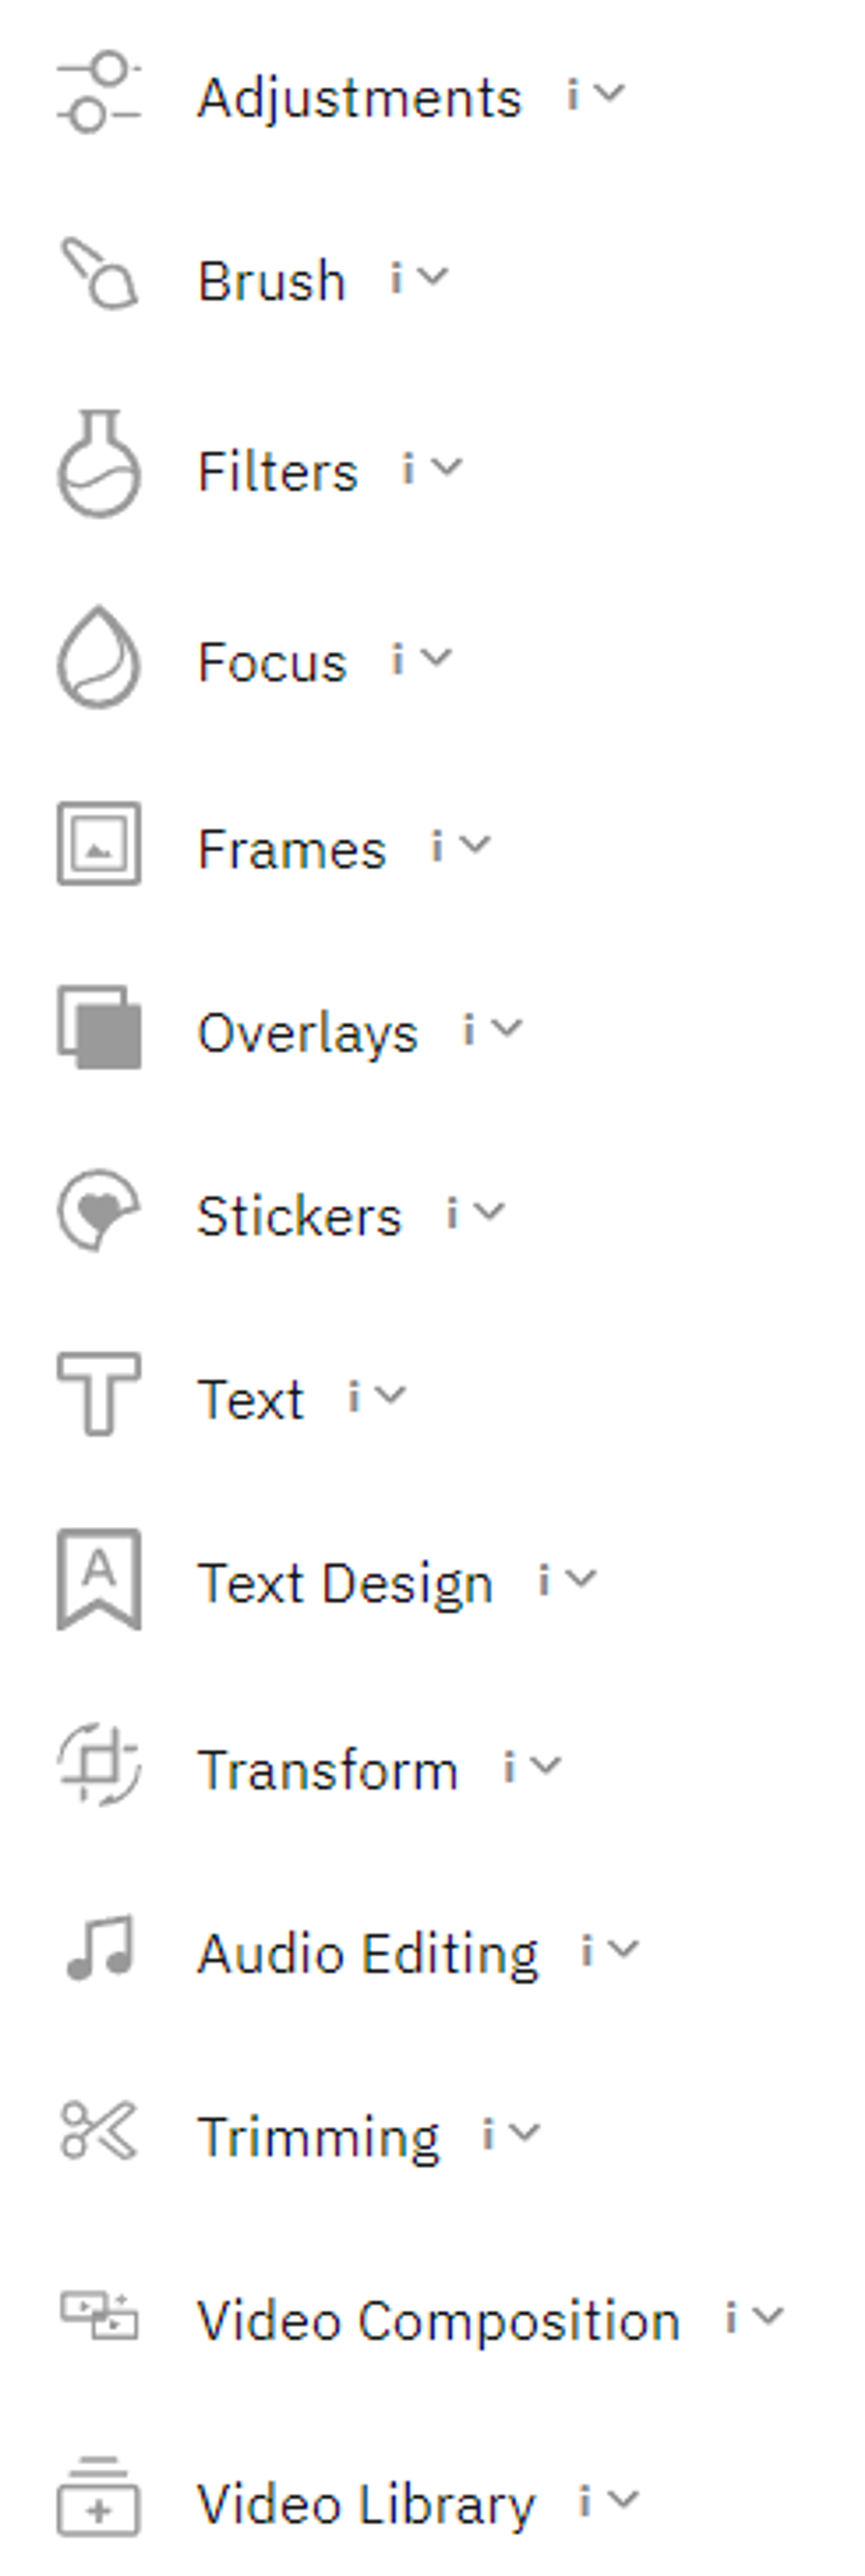
•
Adjustments
•
Brush
•
Filters
•
Focus
•
Frames
•
Overlays
•
Stickers
•
Text
•
Text Design
•
Transform
•
Audio Editing
•
Trimming
•
Video Composition
•
VIdeo Library
가격 정책
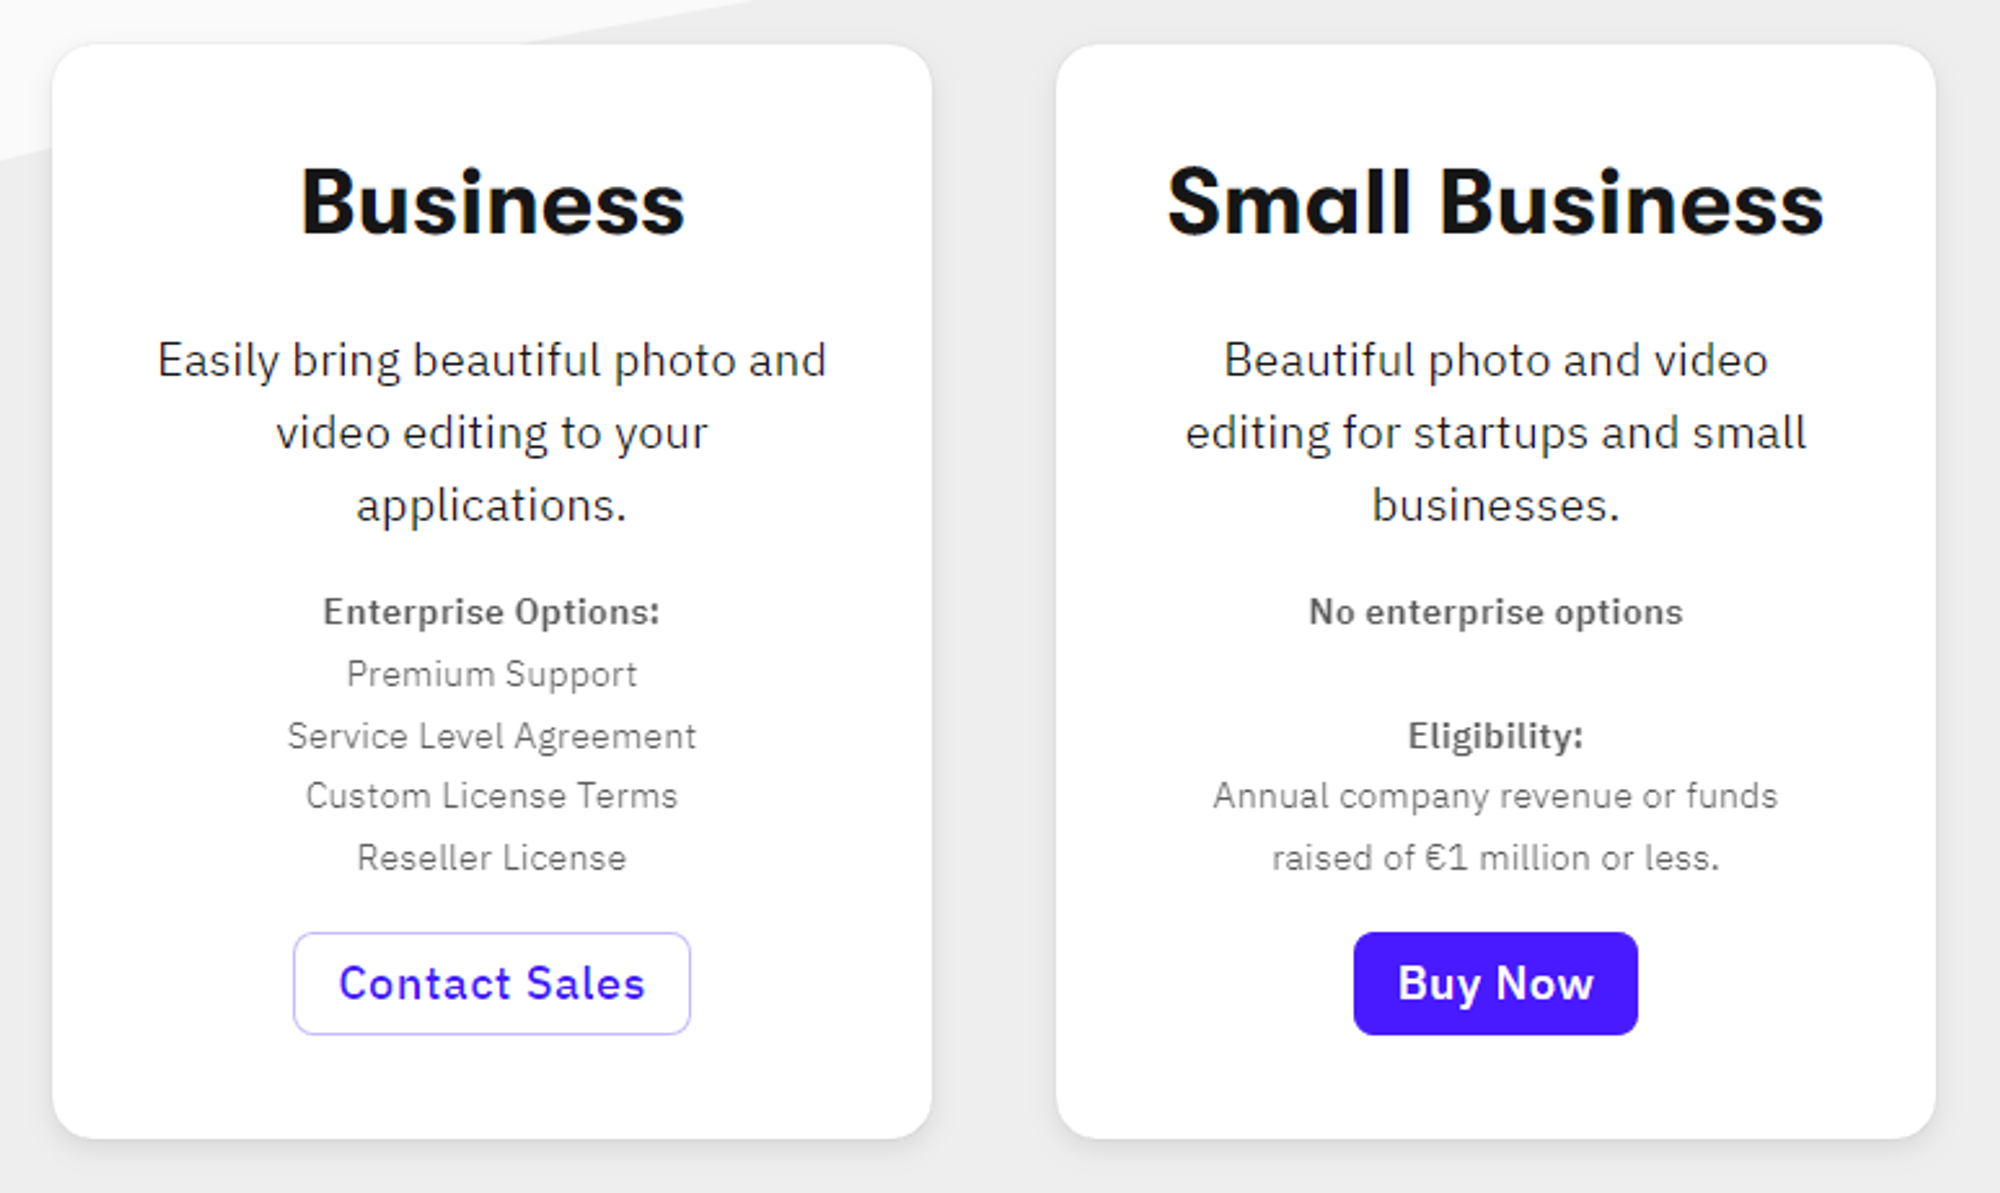
두 가지 정책이 있는데 대부분 보통의 경우는 Small Business로 충분하다.
•
Photo SDK만 쓸지 Video SDK만 쓸지 다 쓸지 선택 가능하다.
•
필요한 플랫폼을 선택 가능하다 [iOS, Android, Web]
•
위에 소개한 기능들을 선택 가능하다
위 세 가지 항목들에 대해 체크를 하면 월 사용료를 알려준다.
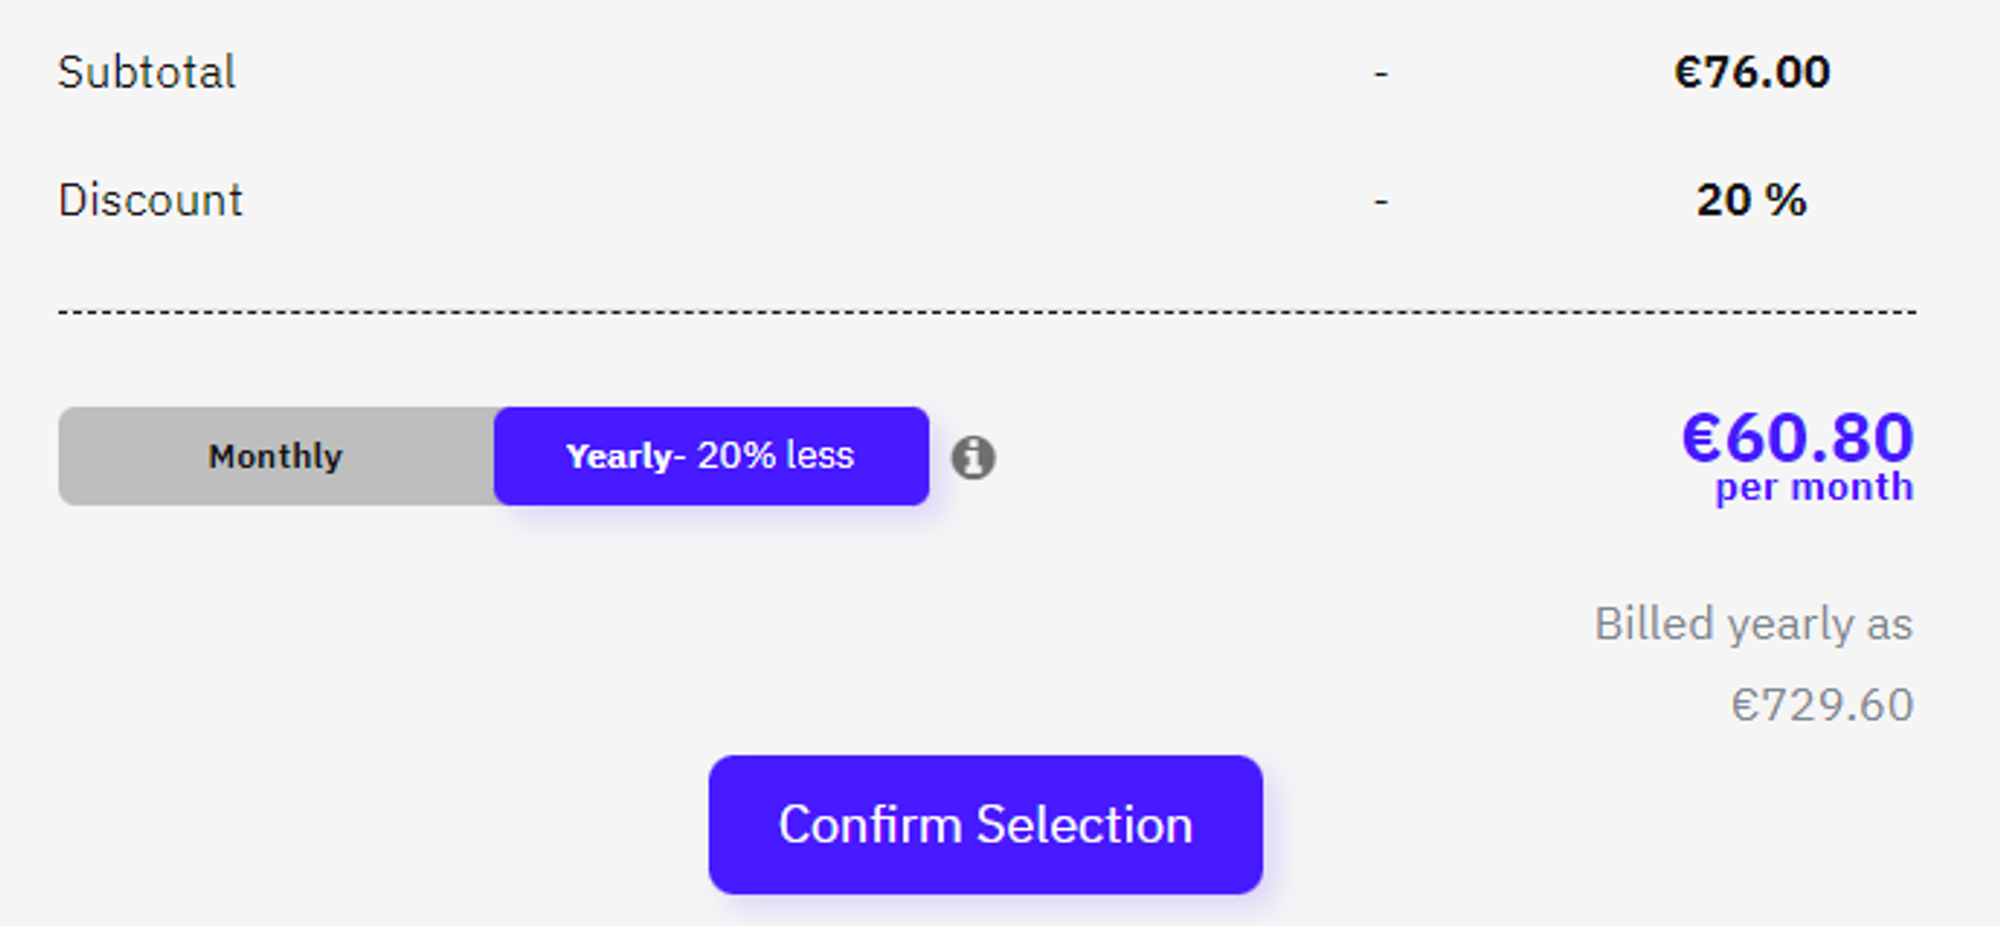
Only Video SDK + Android, iOS + Trimming, Transform만 선택한 결과 월 사용료는 약 8만원 (60.80 유로)라고 한다.
Android 적용
Get Started
build.gradle (prject)
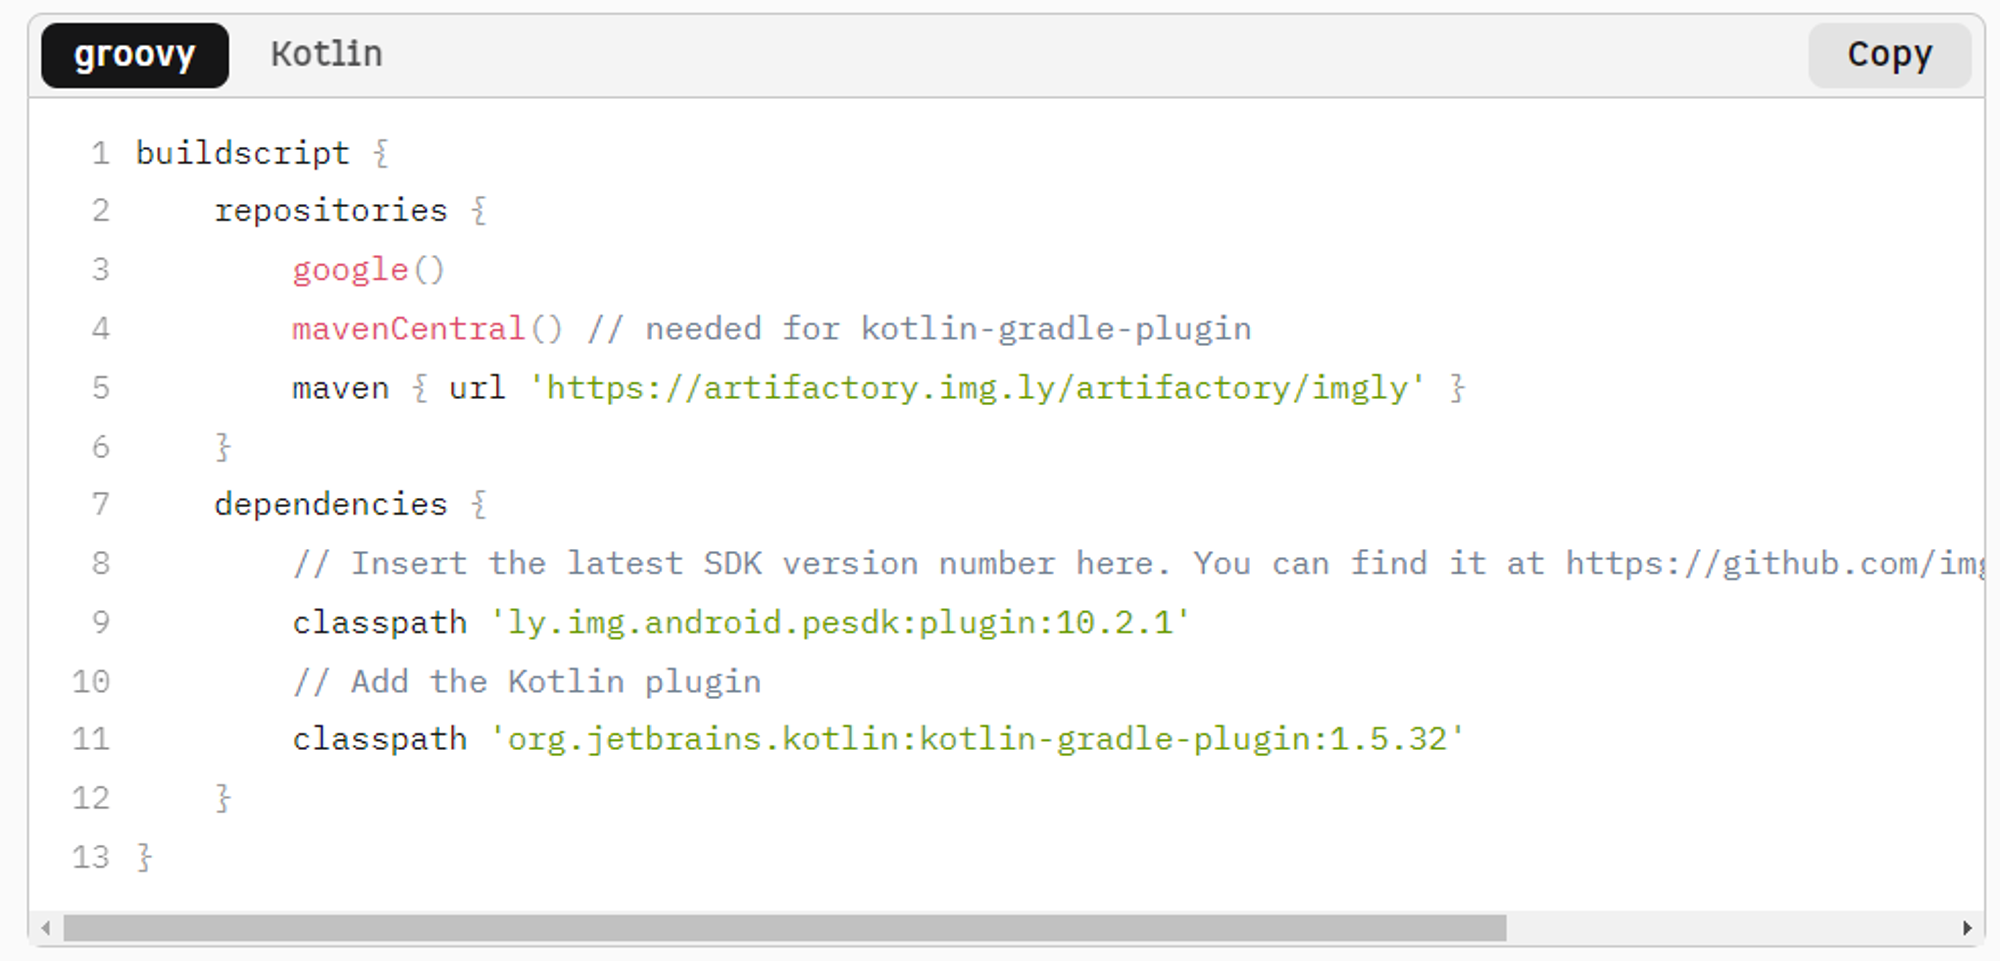
buildscript {
repositories {
google()
mavenCentral() // needed for kotlin-gradle-plugin
maven { url 'https://artifactory.img.ly/artifactory/imgly' }
}
dependencies {
// Insert the latest SDK version number here. You can find it at https://github.com/imgly/pesdk-android-demo/releases
classpath 'ly.img.android.pesdk:plugin:10.2.1'
// Add the Kotlin plugin
classpath 'org.jetbrains.kotlin:kotlin-gradle-plugin:1.5.32'
}
}
Groovy
복사
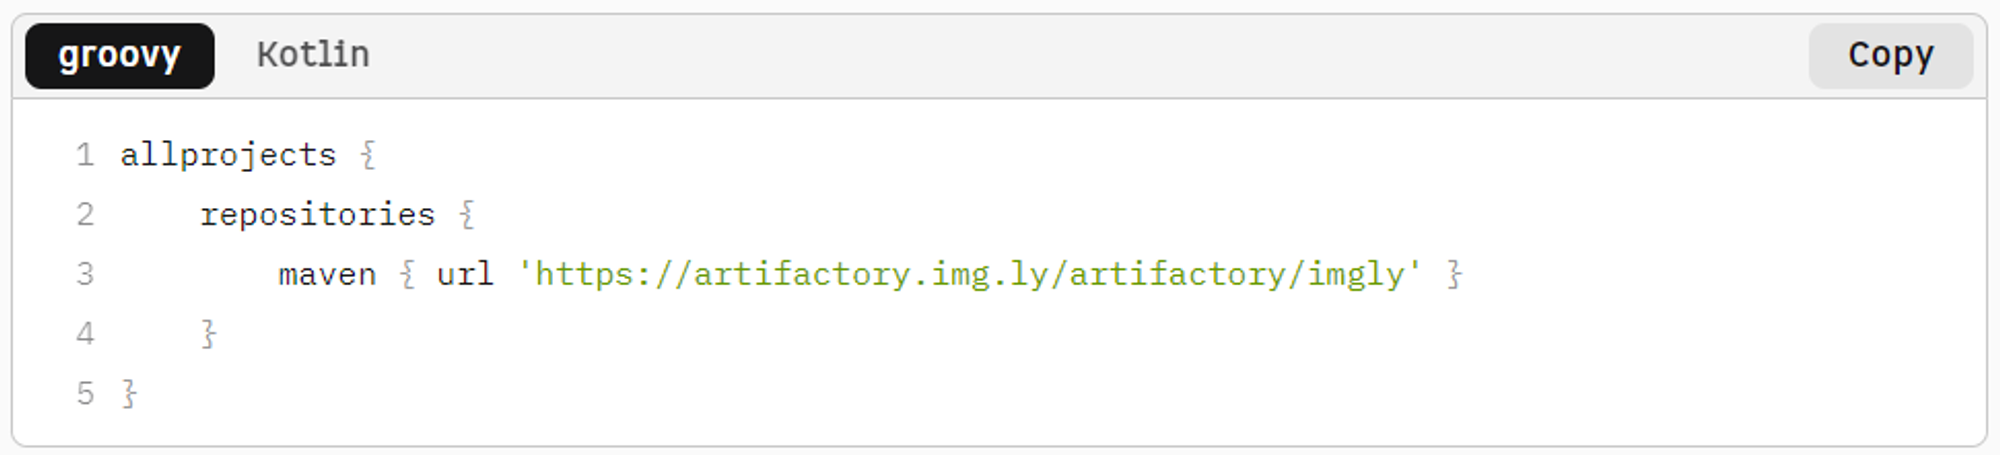
allprojects {
repositories {
maven { url 'https://artifactory.img.ly/artifactory/imgly' }
}
}
Groovy
복사
build.gradle (App)
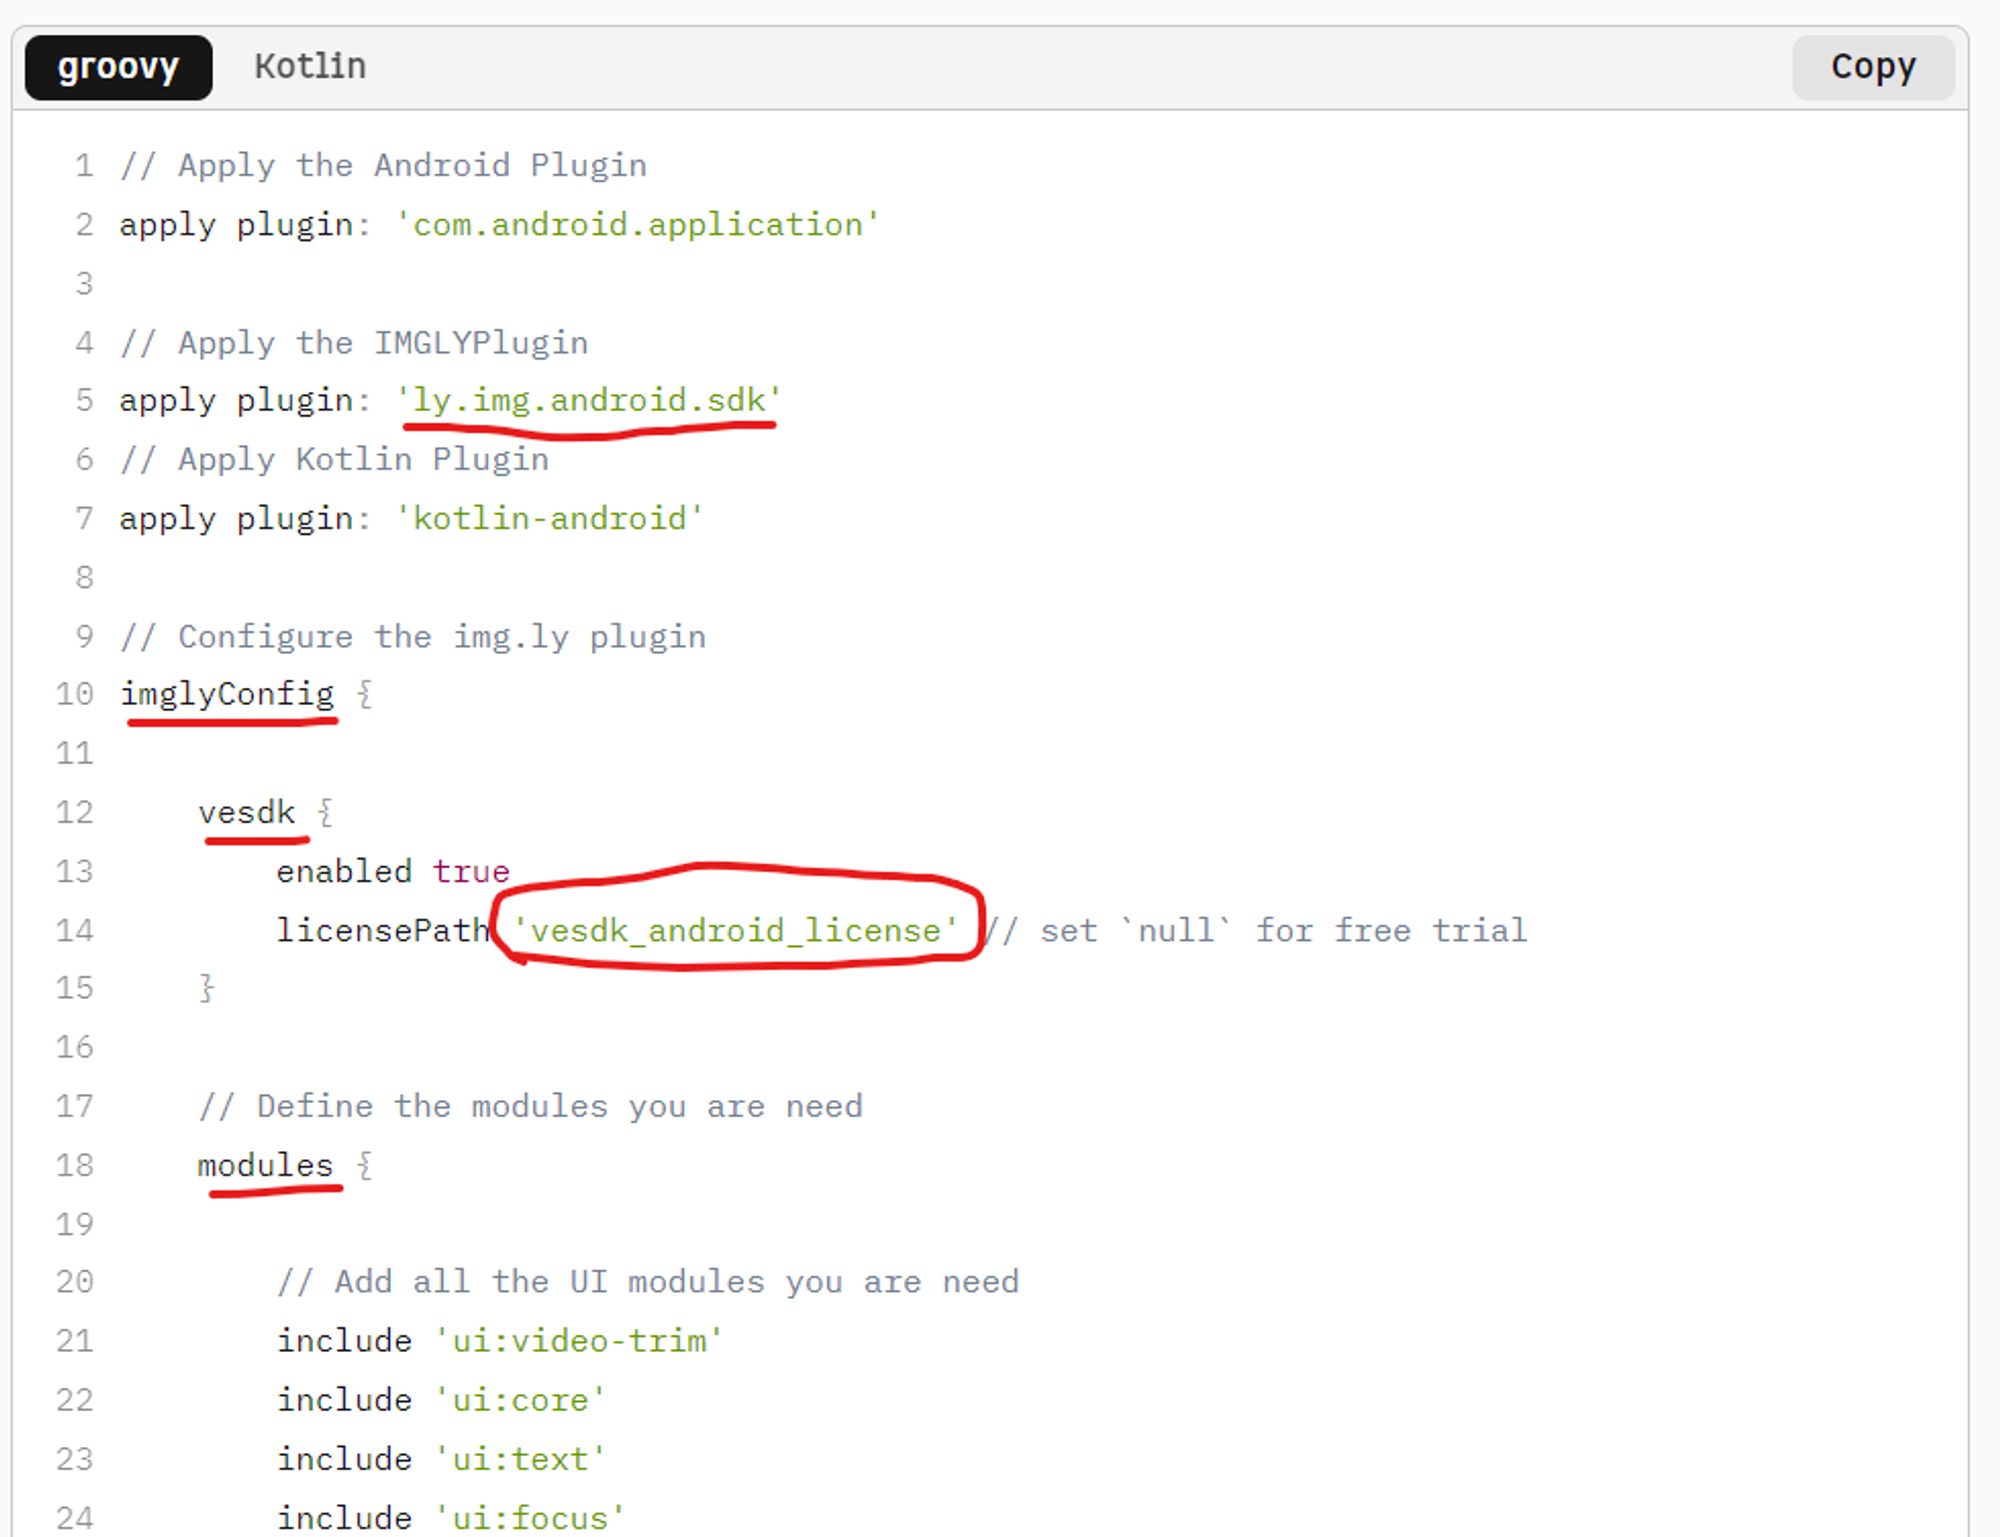
일단은 trial Version을 사용할 것이기 때문에 위 사진에 동그라미 친 부분을 다음과 같이 null로 변경한다. (라이센스를 사용중이면 asset 밑에 넣어주면 된다)
vesdk {
enabled true
licensePath null// set `null` for free trial
}
Groovy
복사
추가해야 할 전체 코드는 아래와 같다.
// Apply the Android Plugin
apply plugin: 'com.android.application'
// Apply the IMGLYPlugin
apply plugin: 'ly.img.android.sdk'
// Apply Kotlin Plugin
apply plugin: 'kotlin-android'
// Configure the img.ly plugin
imglyConfig {
vesdk {
enabled true
licensePath 'vesdk_android_license' // set `null` for free trial
}
// Define the modules you are need
modules {
// Add all the UI modules you are need
include 'ui:video-trim'
include 'ui:core'
include 'ui:text'
include 'ui:focus'
include 'ui:frame'
include 'ui:brush'
include 'ui:filter'
include 'ui:sticker'
include 'ui:overlay'
include 'ui:transform'
include 'ui:adjustment'
include 'ui:text-design'
// Add the serializer if you need
include 'backend:serializer'
// Add asset packs if you need
include 'assets:font-basic'
include 'assets:frame-basic'
include 'assets:filter-basic'
include 'assets:overlay-basic'
include 'assets:sticker-shapes'
include 'assets:sticker-emoticons'
}
}
Groovy
복사
ImglyActivity 추가
이 Activity를 간략하게 설명하자면, 갤러리에 접근해 사진(Uri)을 가져오고(GALLERY_RESULT), Imgly Editor 화면으로 전달(VESDK_RESULT)해 편집을 시작한다.
아래 코드를 그대로 사용해도 무방하다. (Deprecated된 startActivityForResult가 써져있는건 참고)
class ImglyActivity : Activity() {
companion object {
const val VESDK_RESULT = 1
const val GALLERY_RESULT = 2
}
// Create an empty new SettingsList and apply the changes on this reference.
// If you include our asset Packs and use our UI you also need to add them to the UI Config,
// otherwise they are only available for the backend (like Serialisation)
// See the specific feature sections of our guides if you want to know how to add your own Assets.
private fun createVesdkSettingsList() =
VideoEditorSettingsList(true)
.configure<UiConfigFilter> {
it.setFilterList(FilterPackBasic.getFilterPack())
}
.configure<UiConfigText> {
it.setFontList(FontPackBasic.getFontPack())
}
.configure<UiConfigFrame> {
it.setFrameList(FramePackBasic.getFramePack())
}
.configure<UiConfigOverlay> {
it.setOverlayList(OverlayPackBasic.getOverlayPack())
}
.configure<UiConfigSticker> {
it.setStickerLists(
StickerPackEmoticons.getStickerCategory(),
StickerPackShapes.getStickerCategory()
)
}
.configure<VideoEditorSaveSettings> {
it.setOutputToGallery(Environment.DIRECTORY_DCIM)
}
override fun onCreate(savedInstanceState: Bundle?) {
super.onCreate(savedInstanceState)
setContentView(R.layout.activity_main)
openSystemGalleryToSelectAVideo()
}
fun openSystemGalleryToSelectAVideo() {
val intent = Intent(Intent.ACTION_PICK)
intent.setDataAndType(MediaStore.Video.Media.EXTERNAL_CONTENT_URI, "video/*")
try {
startActivityForResult(intent, GALLERY_RESULT)
} catch (ex: ActivityNotFoundException) {
Toast.makeText(
this,
"No Gallery APP installed",
Toast.LENGTH_LONG
).show()
}
}
fun openEditor(inputSource: Uri?) {
val settingsList = createVesdkSettingsList()
settingsList.configure<LoadSettings> {
it.source = inputSource
}
VideoEditorBuilder(this)
.setSettingsList(settingsList)
.startActivityForResult(this, VESDK_RESULT)
settingsList.release()
}
override fun onActivityResult(requestCode: Int, resultCode: Int, intent: Intent) {
super.onActivityResult(requestCode, resultCode, intent)
if (resultCode == RESULT_OK && requestCode == GALLERY_RESULT) {
// Open Editor with some uri in this case with an video selected from the system gallery.
openEditor(intent.data)
} else if (resultCode == RESULT_OK && requestCode == VESDK_RESULT) {
// Editor has saved an Video.
val data = EditorSDKResult(intent)
Log.i("VESDK", "Source video is located here ${data.sourceUri}")
Log.i("VESDK", "Result video is located here ${data.resultUri}")
// TODO: Do something with the result video
// OPTIONAL: read the latest state to save it as a serialisation
val lastState = data.settingsList
try {
IMGLYFileWriter(lastState).writeJson(
File(
getExternalFilesDir(null),
"serialisationReadyToReadWithPESDKFileReader.json"
)
)
} catch (e: IOException) {
e.printStackTrace()
}
lastState.release()
} else if (resultCode == RESULT_CANCELED && requestCode == VESDK_RESULT) {
// Editor was canceled
val data = EditorSDKResult(intent)
val sourceURI = data.sourceUri
// TODO: Do something with the source...
}
}
}
Groovy
복사
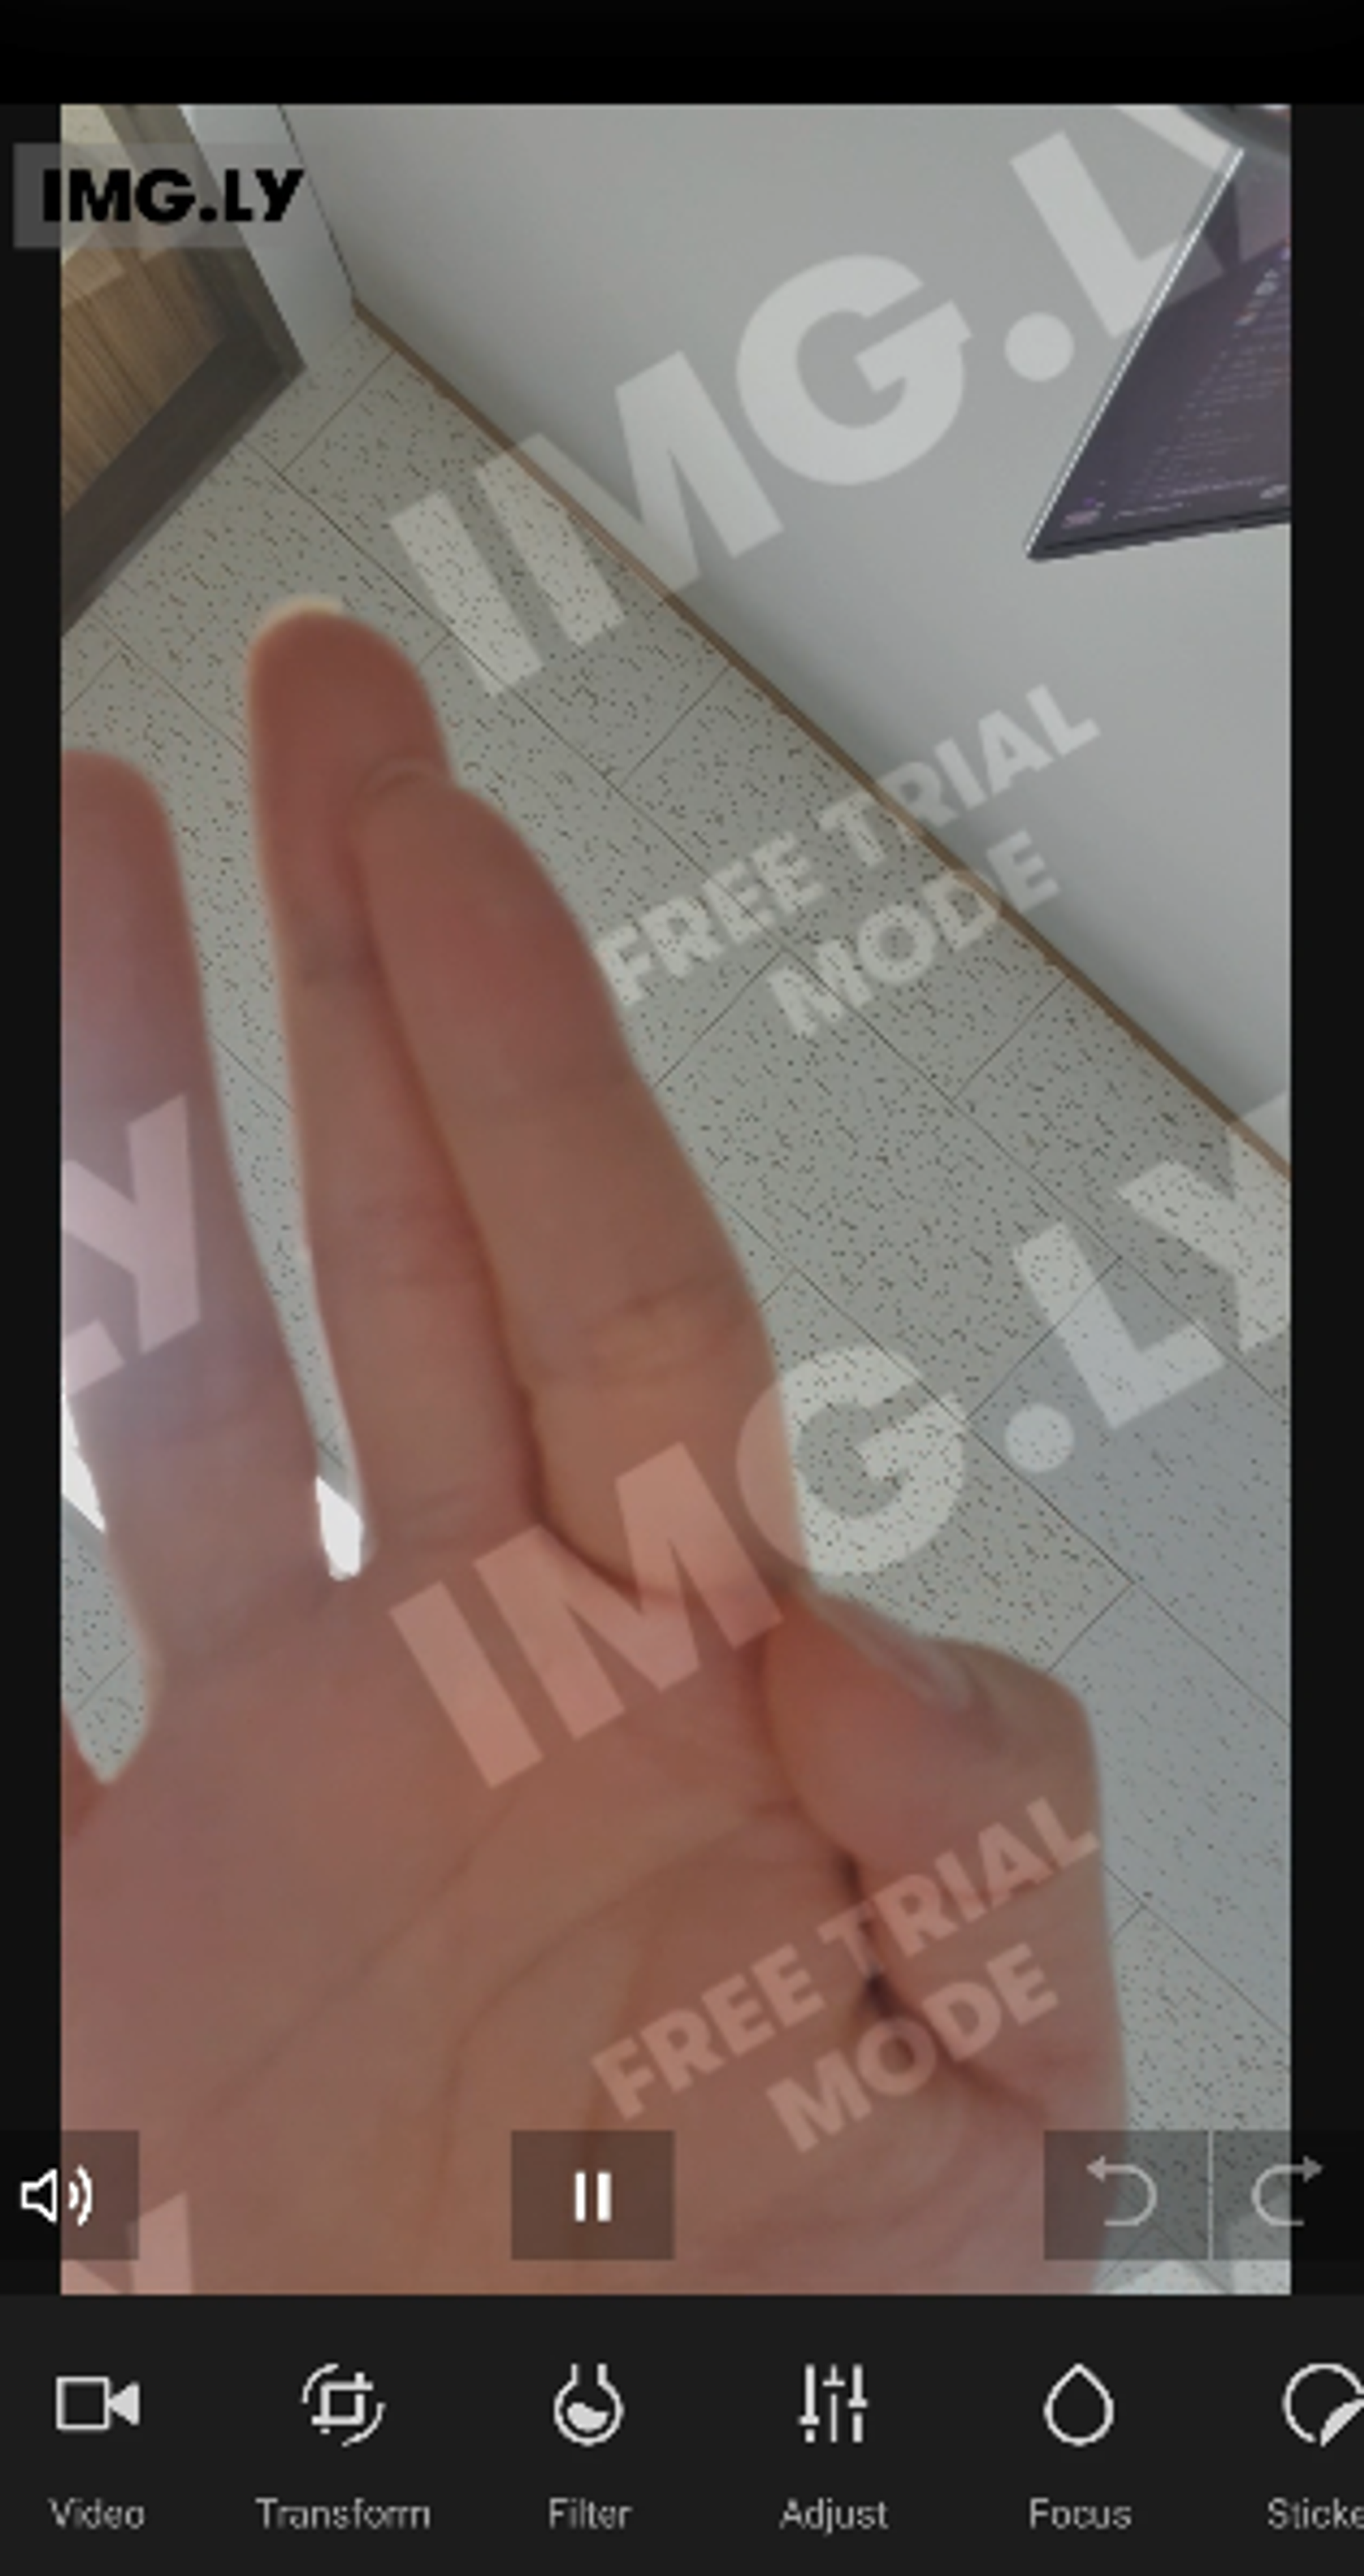
이 부분까지 왔다면, Imgly를 실행시키고, 기본적으로 제공해주는 기능들을 다 사용할 수 있다.(trial version이라 Imgly 워터마크 부착)
이제부터, 필요한 기능에 대해 변경하고, 원하는 UI대로 Customize하는 방법에 대해 설명한다.
Customize
기능 변경

좌측의 Video(Trimming)과 Transform을 제외한 나머지를 치워보자.
우선 Customize하기 위해서는 VideoEditorActivity를 상속받아 Activity를 하나 더 만들어야 한다.
ImglyEditorActivity 추가
class ImglyEditorActivity : VideoEditorActivity() {
override fun onCreate(savedInstanceState: Bundle?) {
super.onCreate(savedInstanceState)
// do something with it if you need to
Toast.makeText(this, "Toast from custom Activity", Toast.LENGTH_SHORT).show()
}
override fun onCloseClicked() {
// Override Editor close behavior, to remove dialog
val stateHandler = stateHandler
val loadSettings = stateHandler[LoadSettings::class]
val result = EditorSDKResult.Builder(EditorSDKResult.Status.CANCELED).also {
it.setProduct(stateHandler.product)
it.setSourceUri(loadSettings.source)
it.setSettingsList(getStateHandler().createSettingsListDump())
}
setResult(result)
finish()
}
override fun onExportStart(stateHandler: StateHandler) {
// Change settings before starting export.
stateHandler[FilterSettings::class].filter = ColorFilterAssetBW()
super.onExportStart(stateHandler)
}
}
Kotlin
복사
변경이 필요한 기능에 대해서는 Overriding해준다. (이 클래스는 Customize를 하지 않는다면 필요 없다)
openEditor()
위에 작성한 내용 중 ImglyActivity에 보면 openEditor()가 있다. 대부분의 기능은 이 openEditor의 settingList를 통해 설정을 해준다. 최초의 모습은 아래 코드 처럼 생겼다.
fun openEditor(inputSource: Uri?) {
val settingsList = createVESDKSettingsList()
settingsList.configure<LoadSettings> {
it.source = inputSource
}
VideoEditorBuilder(this, ImglyEditorActivity::class.java)
.setSettingsList(settingsList)
.startActivityForResult(this, VESDK_RESULT)
settingsList.release()
}
Kotlin
복사

VideoEditorBuilder 부분을 보면 원래는 VideoEditorBuilder(this)로 끝났지만, Customize를 위해 ImglyEditorActivity::class.java를 생성자에 하나 더 넣어주자.
Menu Item 변경
공식 문서를 보면 Menu Items라는 항목이 있다. settingsList.configure<UiConfigMainMenu>를 설정해 주면 된다.
fun openEditor(inputSource: Uri?) {
val settingsList = createVESDKSettingsList()
settingsList.configure<LoadSettings> {
it.source = inputSource
}
settingsList.configure<UiConfigMainMenu> {
it.setToolList(
ToolItem("imgly_tool_trim", R.string.vesdk_video_trim_title_name, ImageSource.create(R.drawable.imgly_icon_tool_trim)),
ToolItem("imgly_tool_transform", R.string.pesdk_transform_title_name, ImageSource.create(R.drawable.imgly_icon_tool_transform)),
)
}
VideoEditorBuilder(this, ImglyEditorActivity::class.java)
.setSettingsList(settingsList)
.startActivityForResult(this, VESDK_RESULT)
settingsList.release()
}
Kotlin
복사
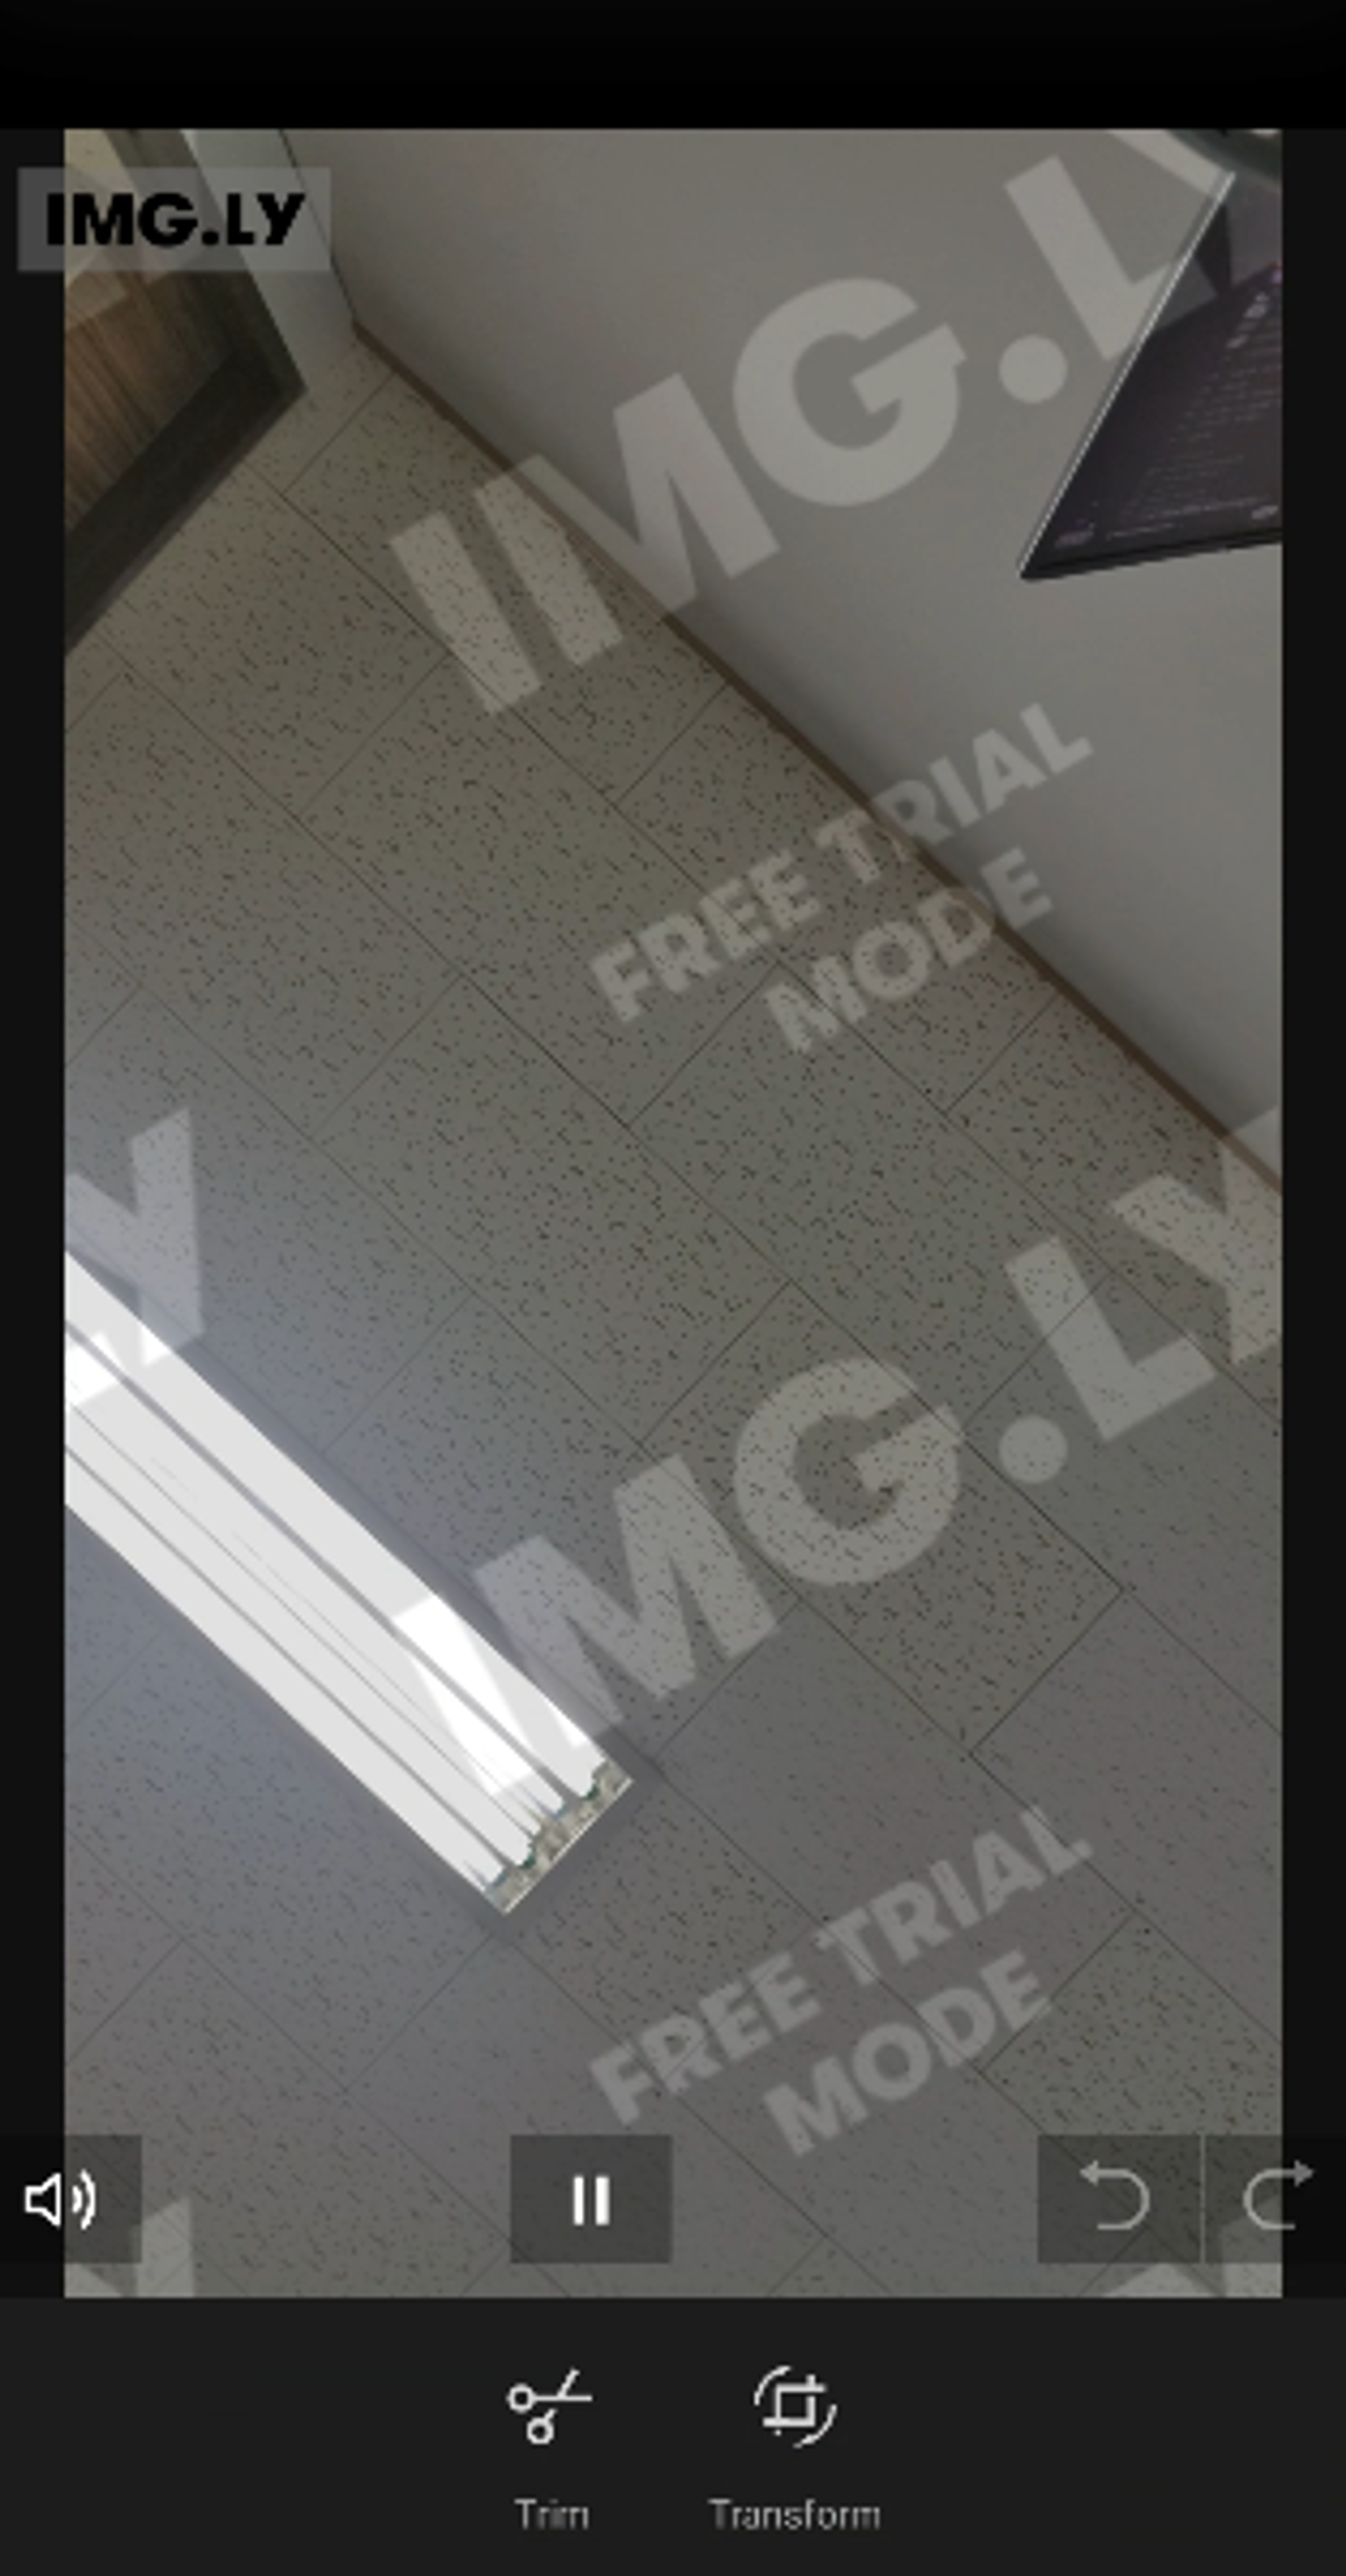
중간에 보면 ToolItem을 두개 넣었는데, 결과 화면을 보면 두개의 기능만 표시된다.
Trim, 영상의 최소 ~ 최대 지정
Trim 기능에 대해 영상의 최소 길이와 최대 길이를 설정해 줄 수 있다. 이것 역시 문서에 설명되어 있는데,
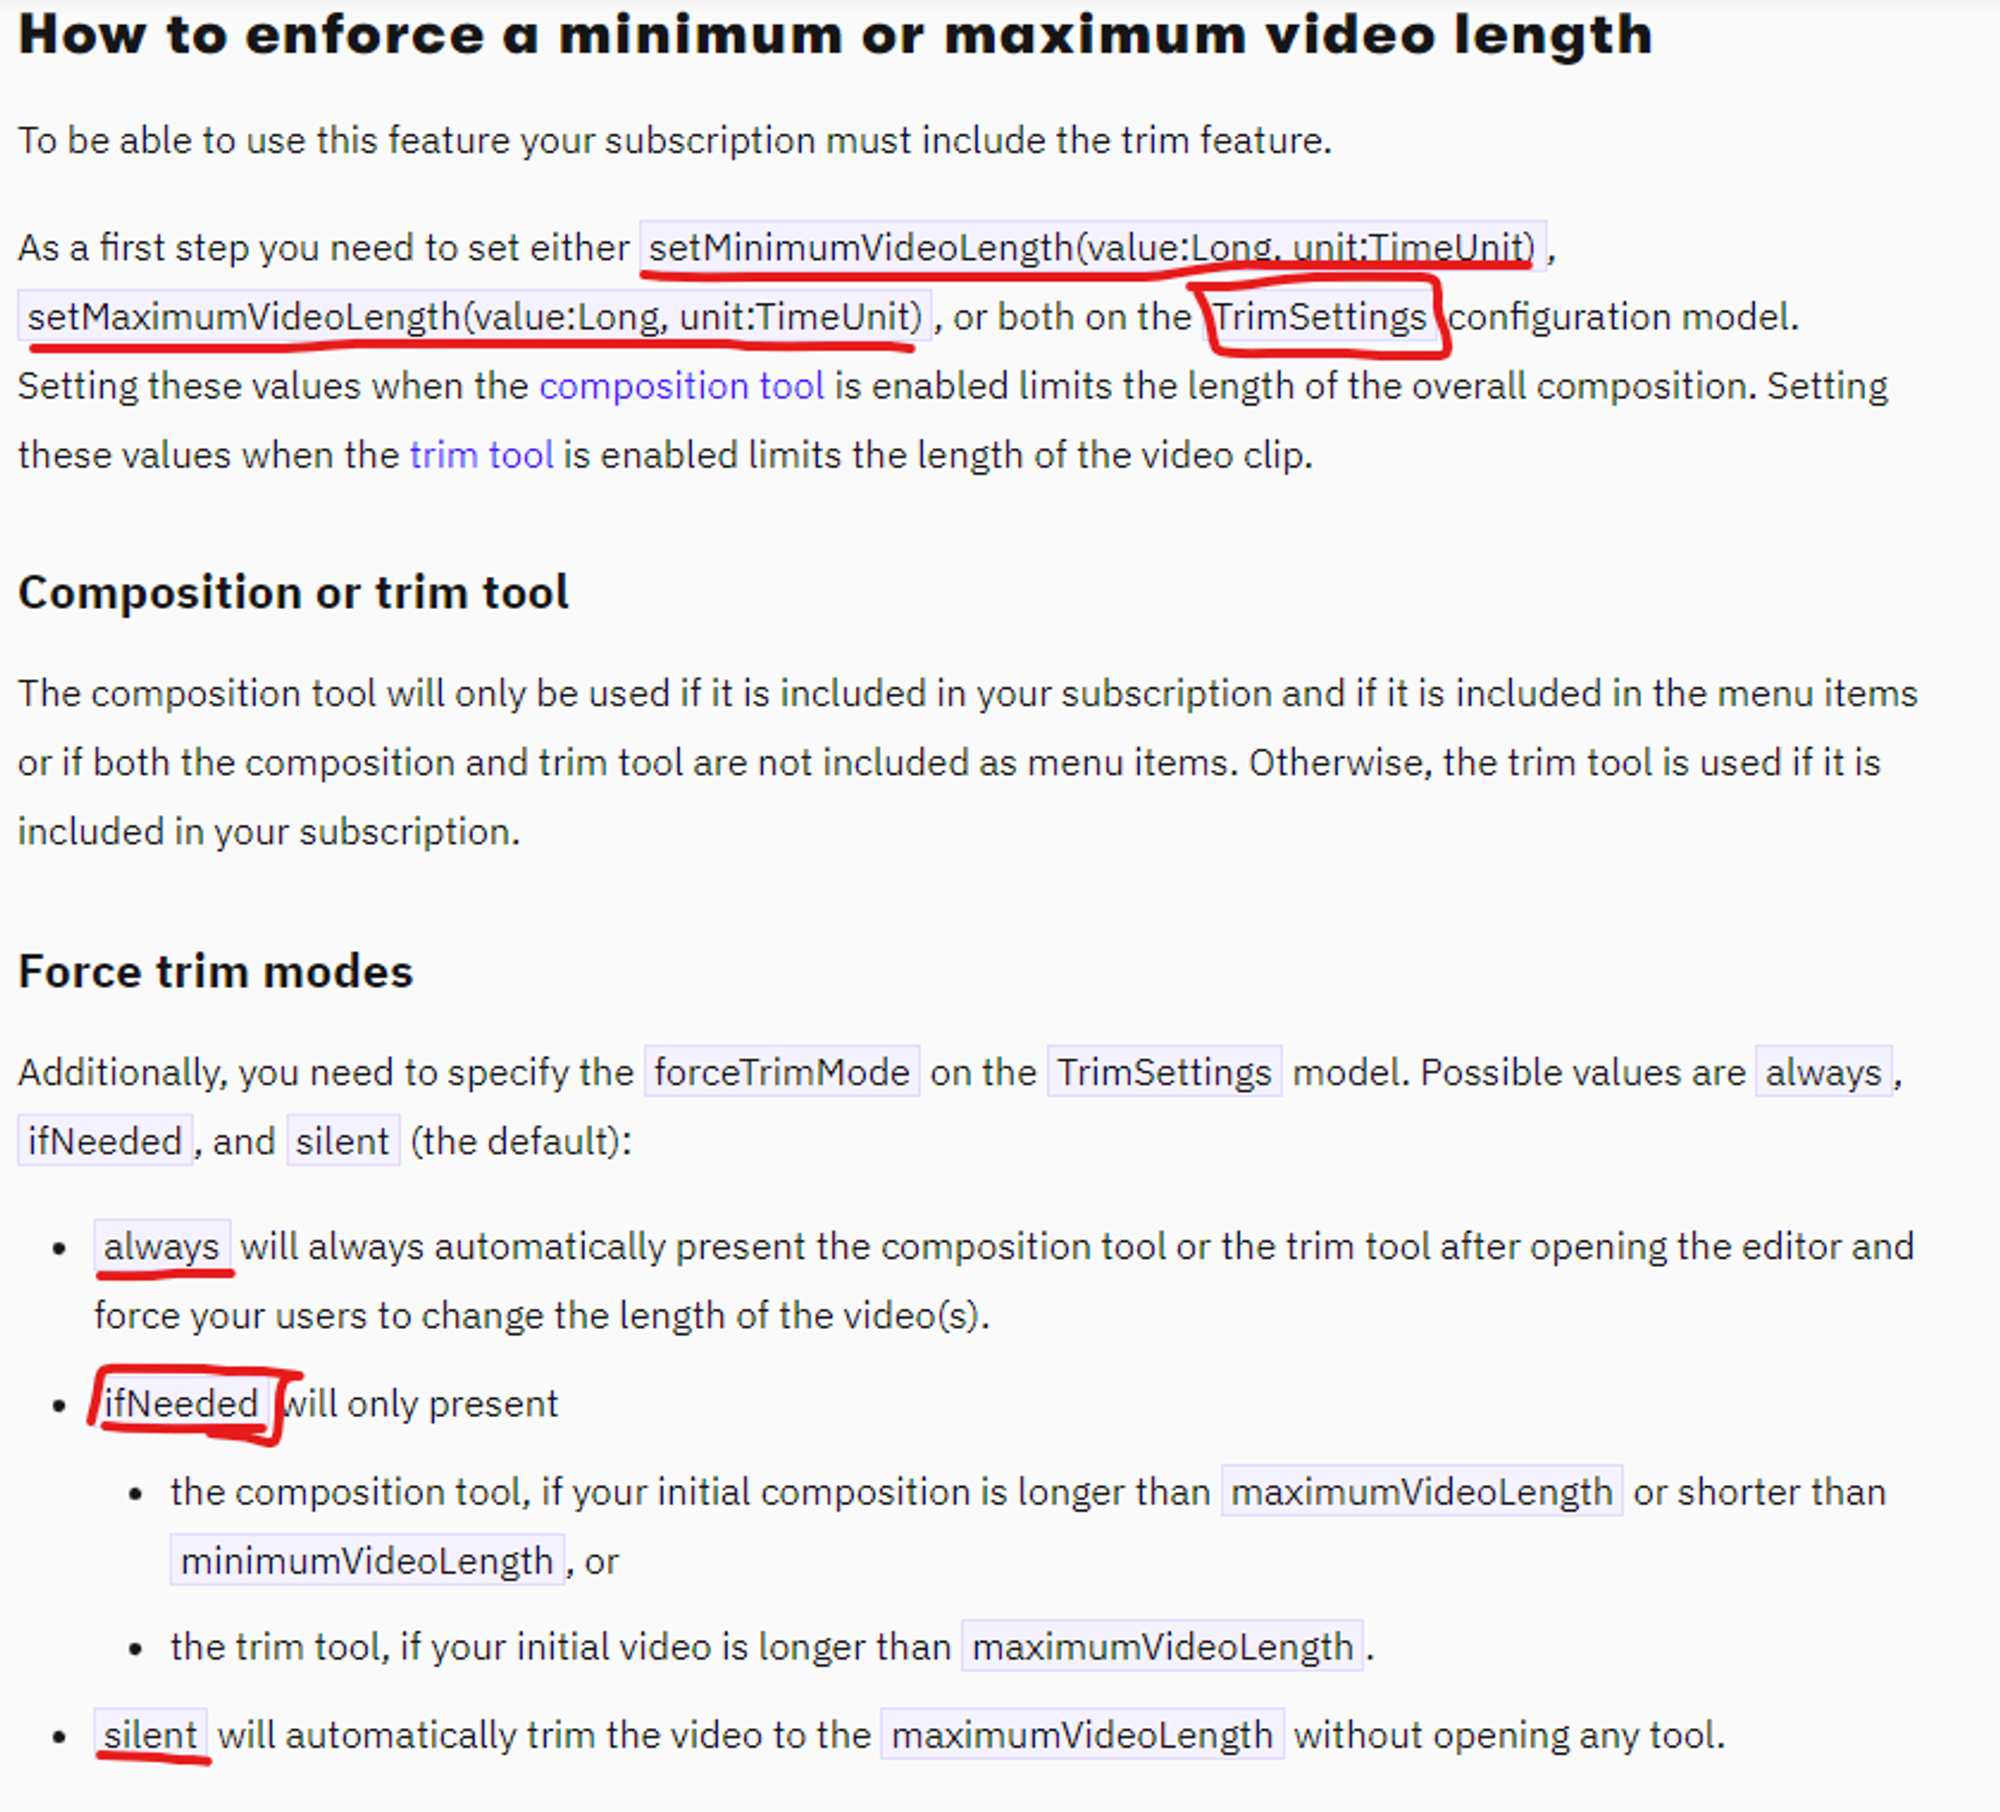
최소 ~ 최대 길이를 설정해 줄 수 있을 뿐만 아니라, ifNeeded 값을 주면 최소 ~ 최대에 맞지 않을 경우 바로 Trim 모드를 진입시켜줄 수 있다.
openEditor()
settingsList.configure<TrimSettings> {
it.setMinimumVideoLength(5000, TimeUnit.MILLISECONDS)
it.setMaximumVideoLength(60000, TimeUnit.MILLISECONDS)
it.forceTrimMode = TrimSettings.ForceTrim.IF_NEEDED
}
Kotlin
복사
최소 5초 ~ 최대 60초로 설정해 주었다. 앱을 실행해 보면 선택한 영상이 5 ~ 60초에 해당하지 않으면 바로 Trim 모드 부터 켜준다. 영상 길이를 5초 밑으로 줄이려 한다거나, 60초 넘기려 하면 알림 메세지가 표시된다.
openEditor()의 전체 코드는 아래와 같다.
fun openEditor(inputSource: Uri?) {
val settingsList = createVESDKSettingsList()
settingsList.configure<LoadSettings> {
it.source = inputSource
}
settingsList.configure<UiConfigMainMenu> {
it.setToolList(
ToolItem("imgly_tool_trim", R.string.vesdk_video_trim_title_name, ImageSource.create(R.drawable.imgly_icon_tool_trim)),
ToolItem("imgly_tool_transform", R.string.pesdk_transform_title_name, ImageSource.create(R.drawable.imgly_icon_tool_transform)),
)
}
settingsList.configure<TrimSettings> {
it.setMinimumVideoLength(5000, TimeUnit.MILLISECONDS)
it.setMaximumVideoLength(60000, TimeUnit.MILLISECONDS)
it.forceTrimMode = TrimSettings.ForceTrim.IF_NEEDED
}
VideoEditorBuilder(this, ImglyEditorActivity::class.java)
.setSettingsList(settingsList)
.startActivityForResult(this, VESDK_RESULT)
settingsList.release()
}
Kotlin
복사
UI 변경
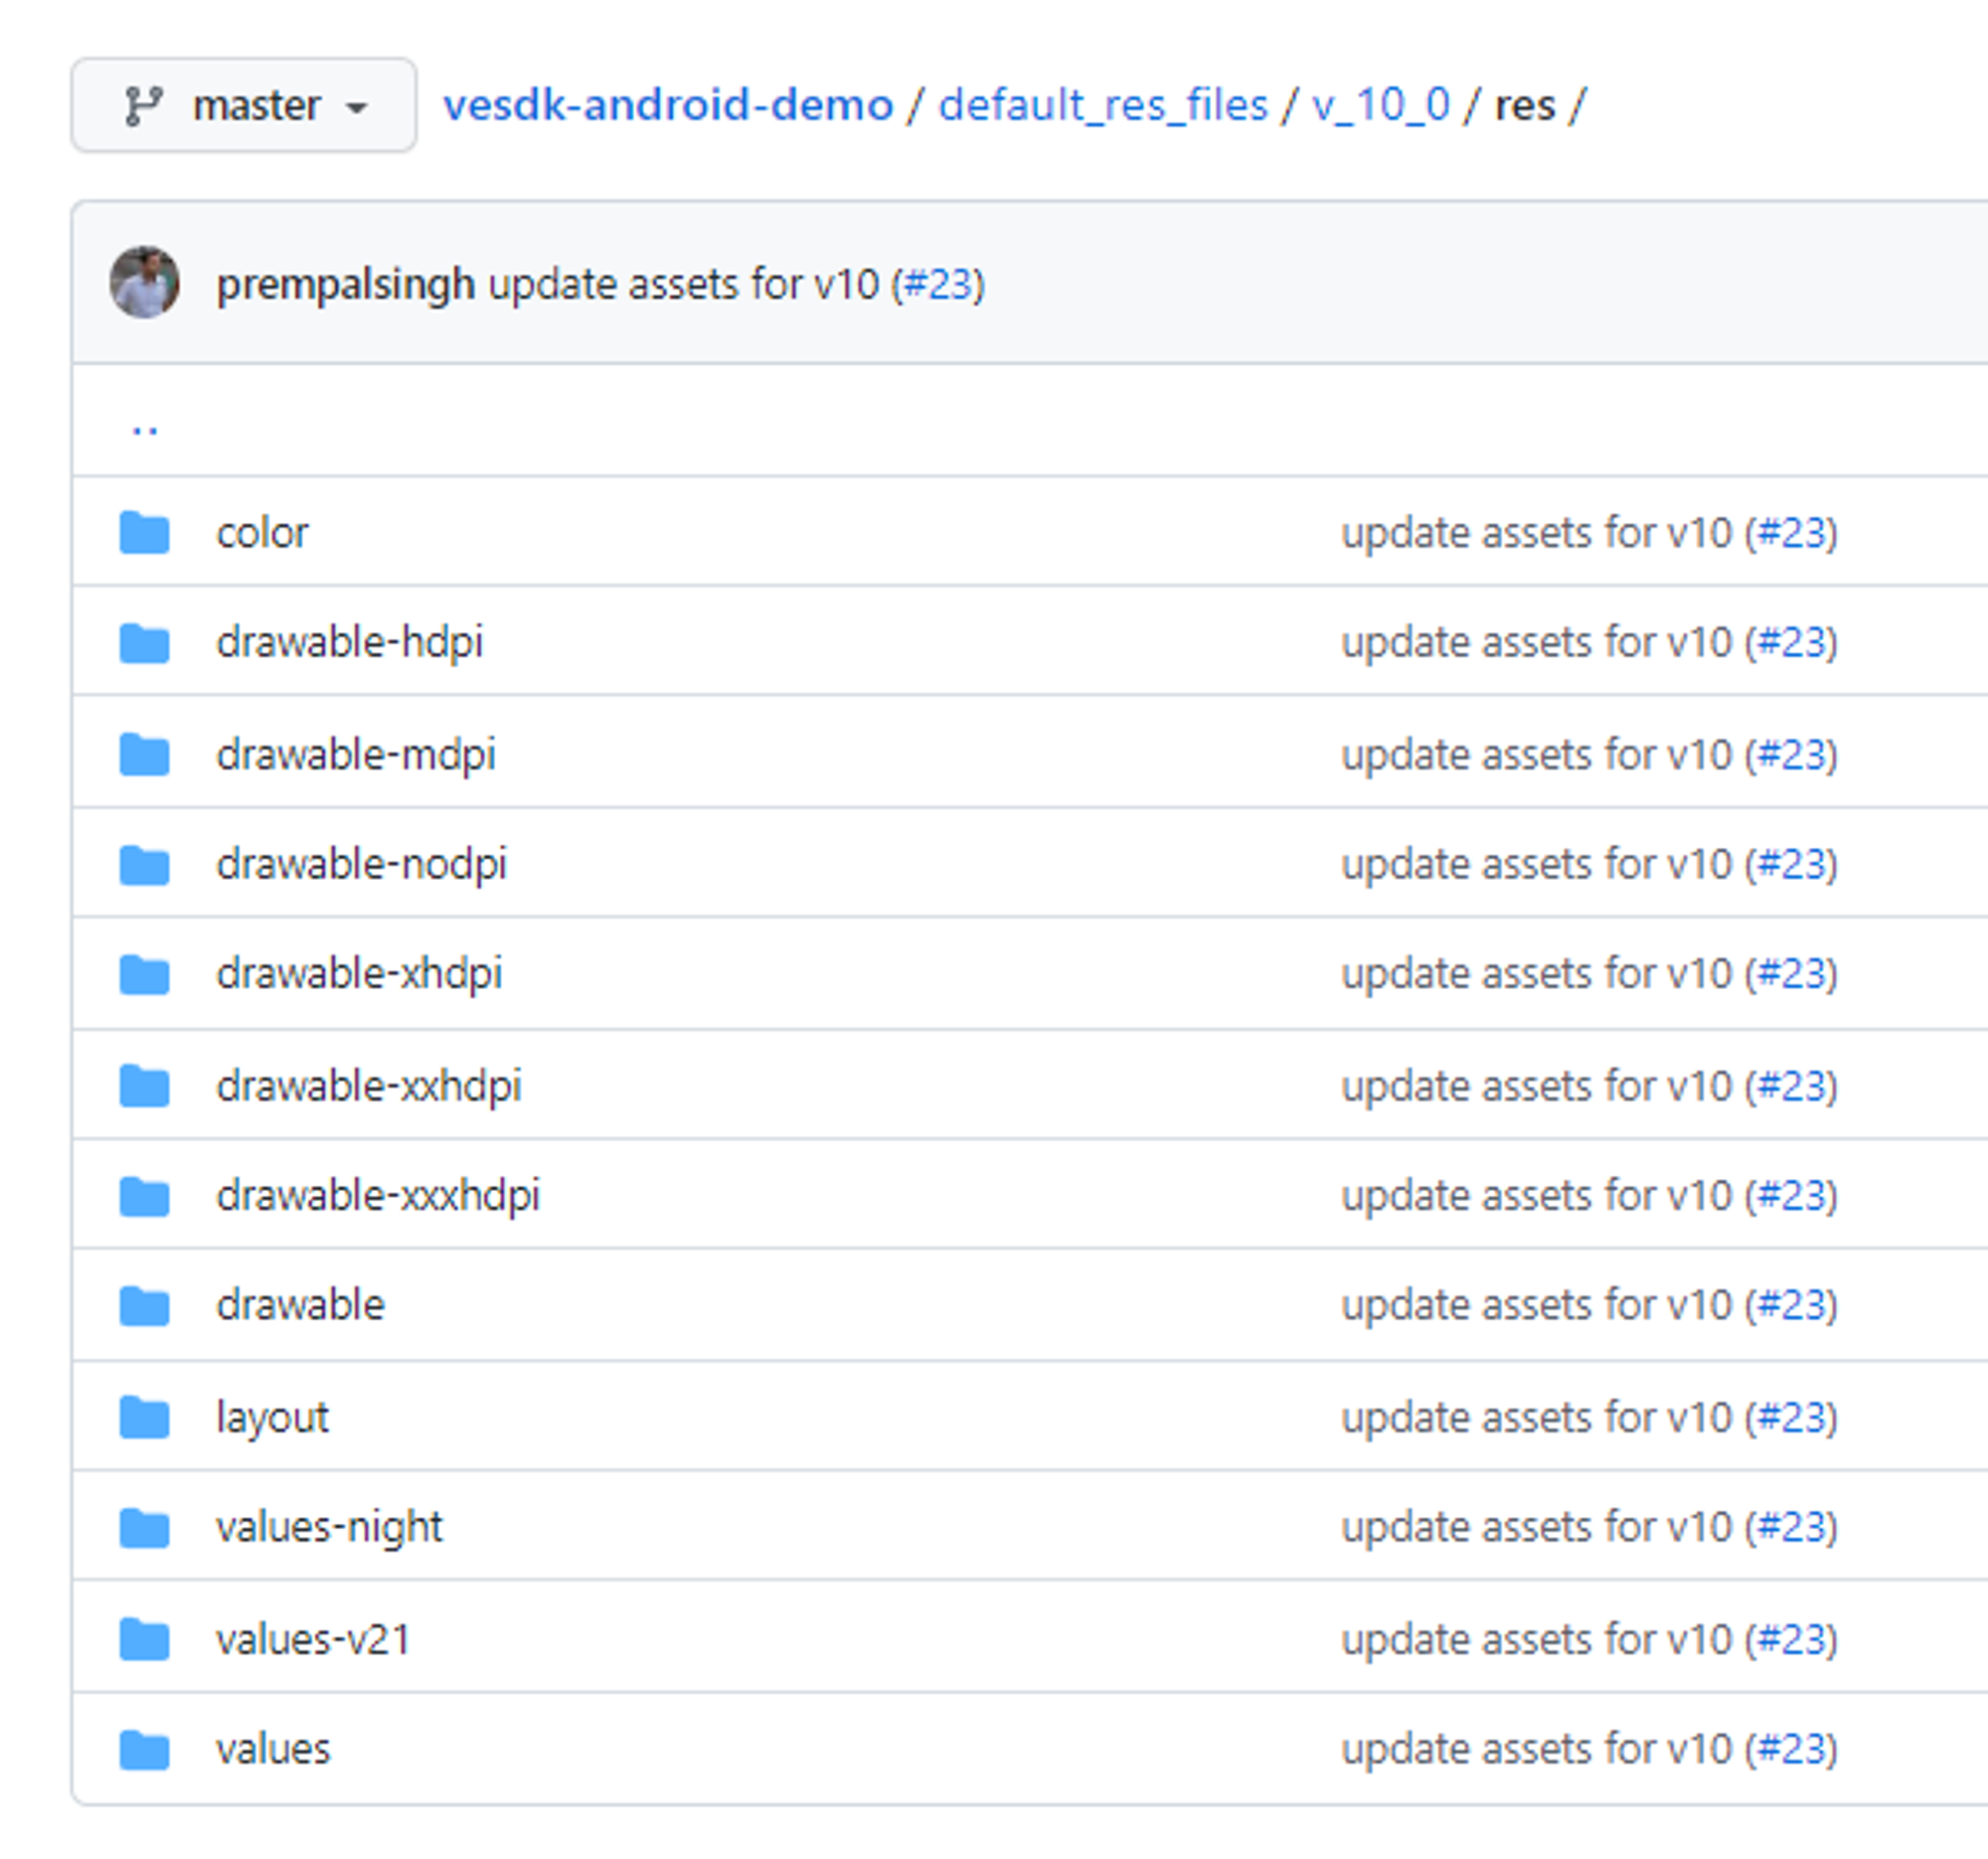
이제 UI 변경을 시도해보자(Sample Code에 있는 리소스를 가지고 설명한다), 여기서 알아야할 것은 Git에 보면 default_res_files라는 폴더가 있는데, 필요한 리소스만 가져와도 좋고, 싹 긁어서 본인의 프로젝트로 붙여 넣어도 좋다.
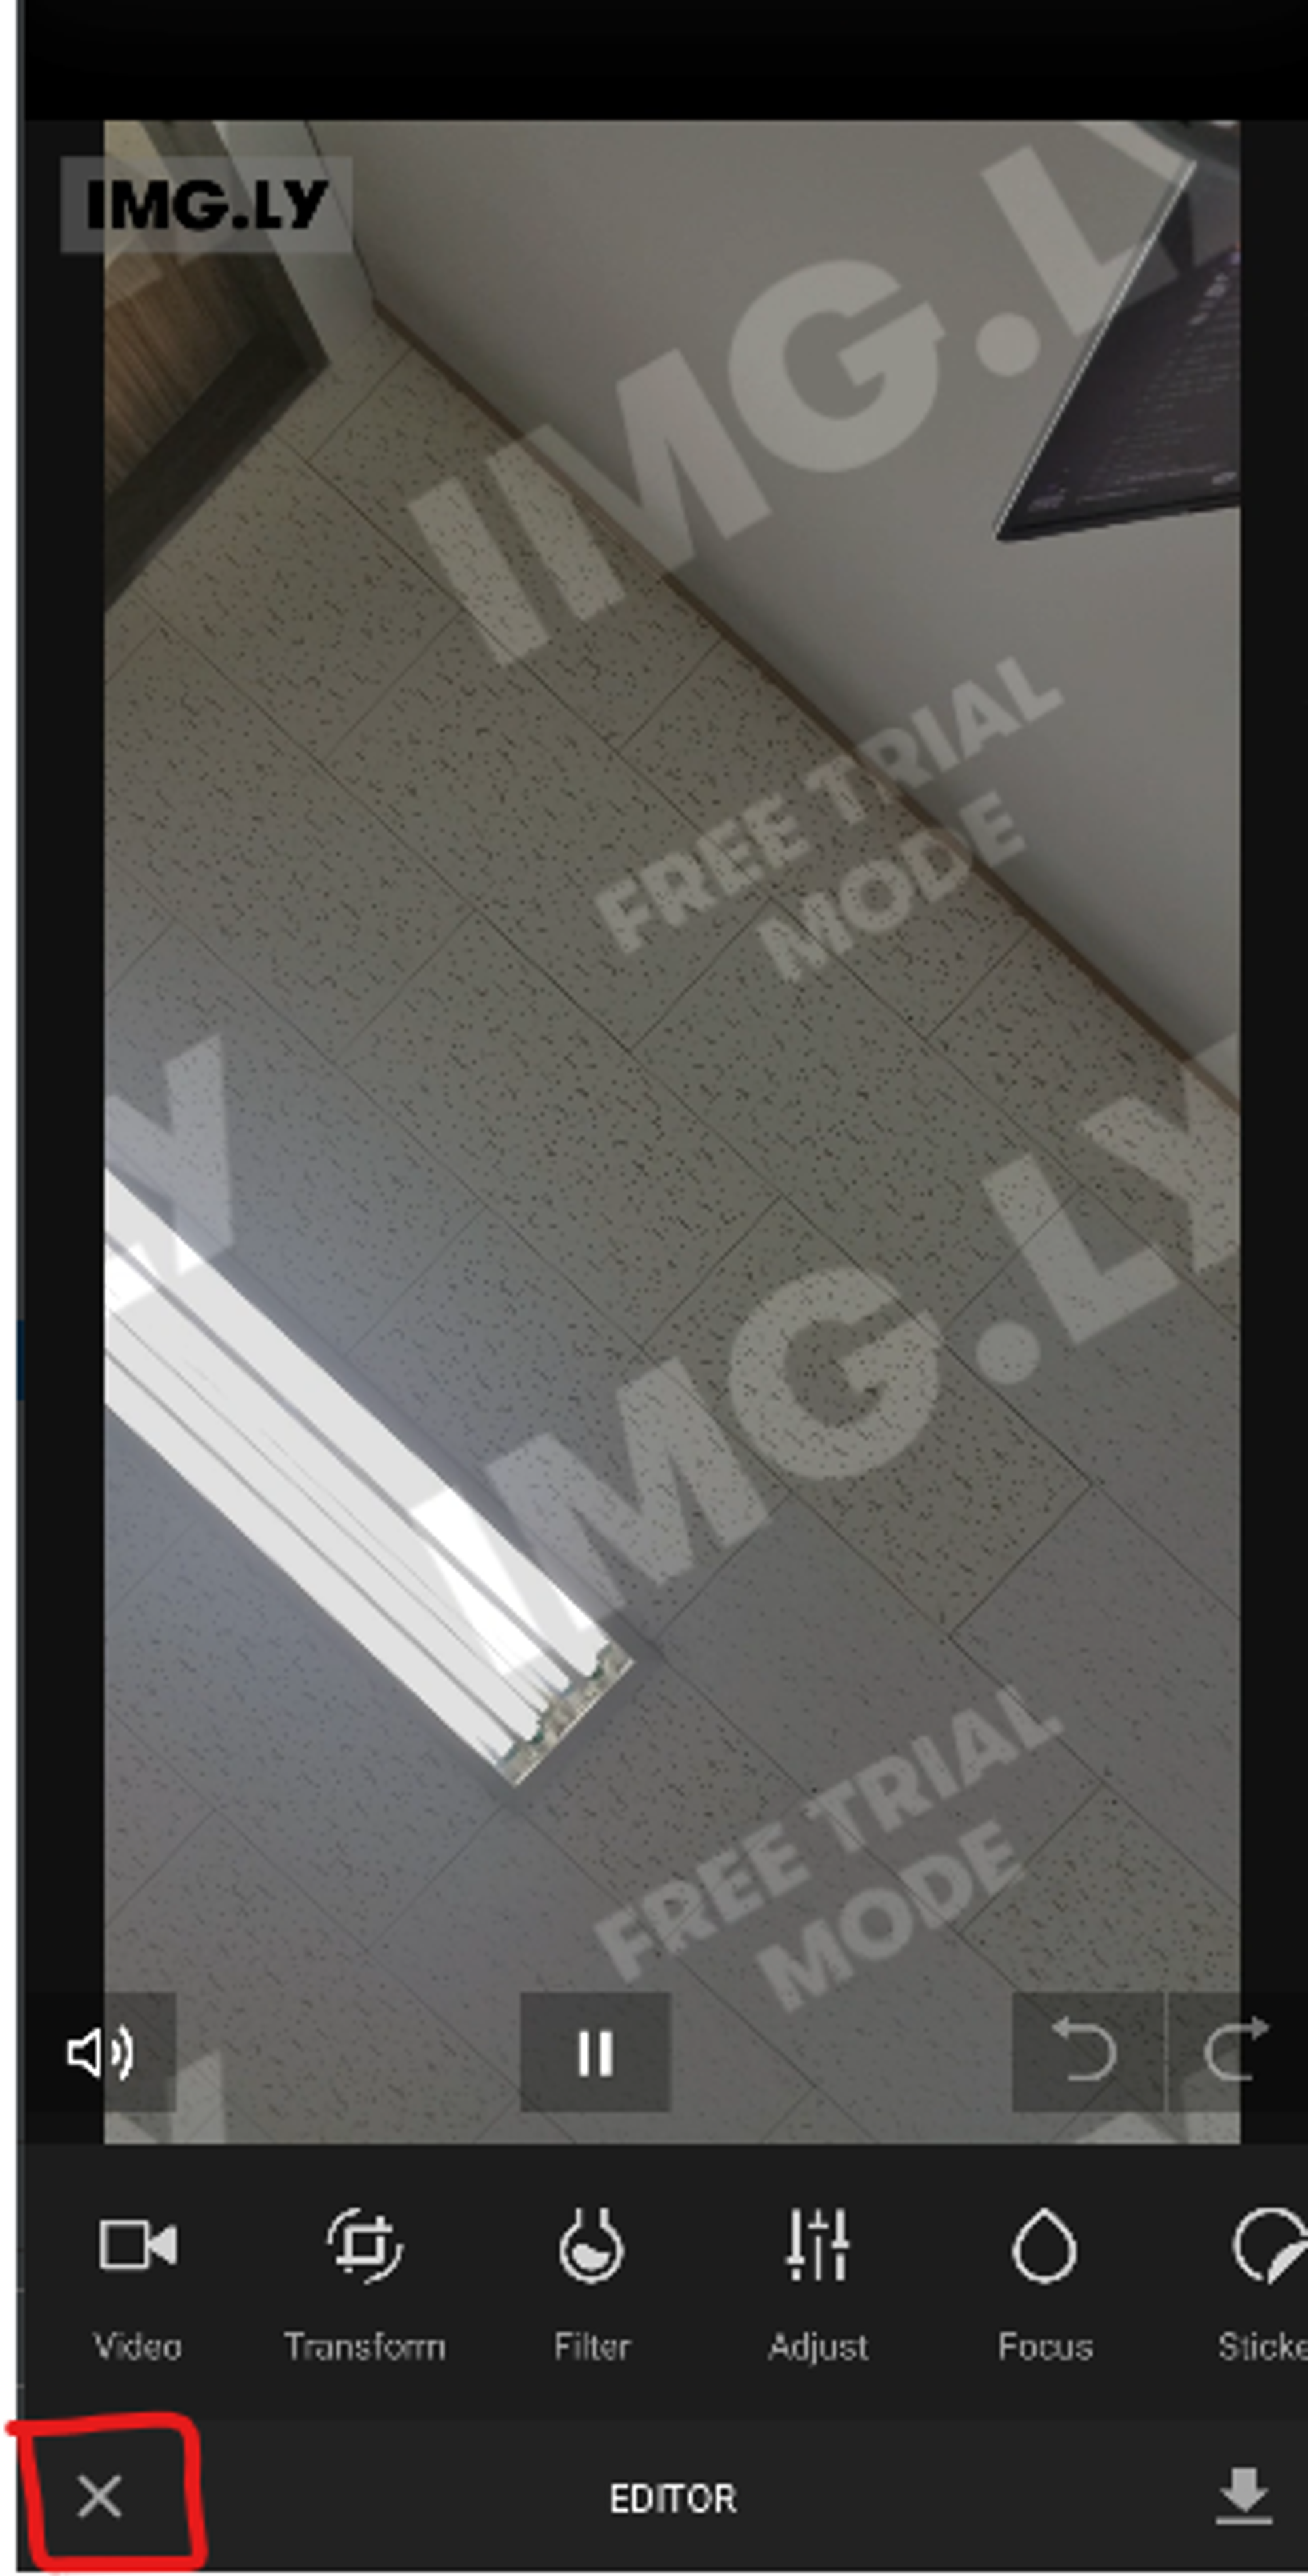
위 사진의 X버튼을 다른 것으로 변경해보자. X 버튼을 변경하려면 Git에서

defailt_res_files/v_10_0/res/layout/imgly_widget_actionbar.xml을 본인의 프로젝트에 그대로 가져온다.
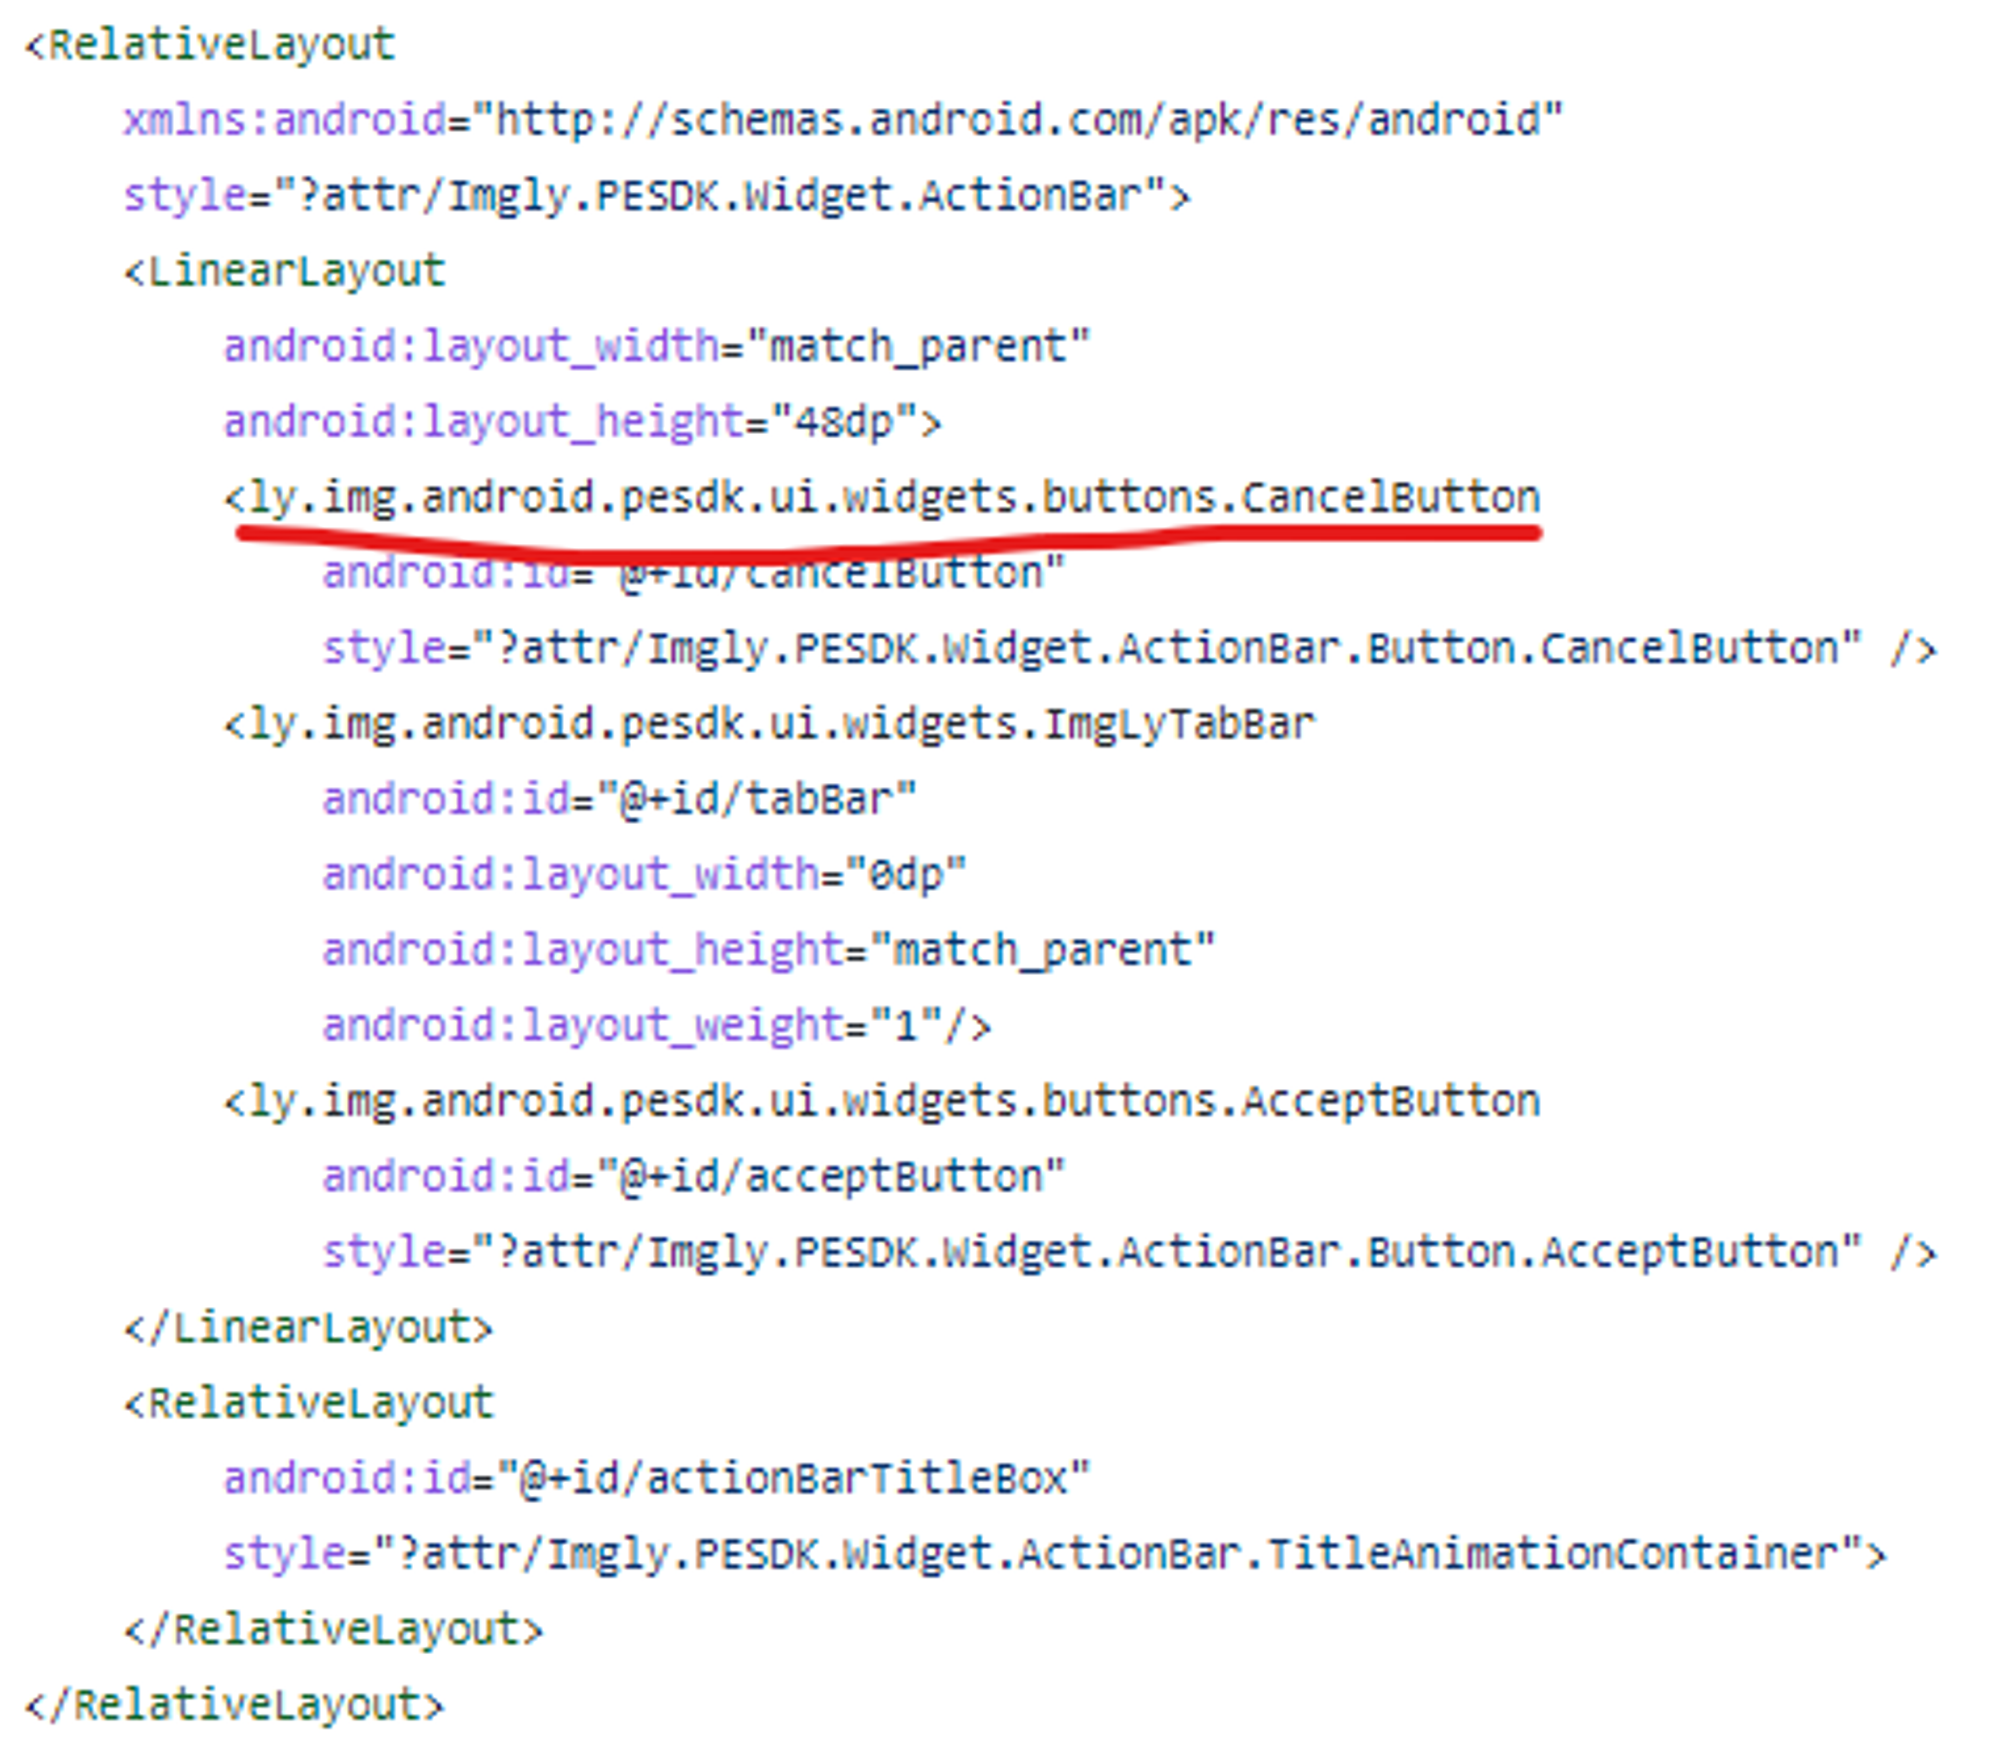
이렇게 생긴 xml의 CancelButton View를 변경해주면 되는데, xml에서 단순하게 CancelButton을 지우고 TextView를 추가해 주어도 된다. 하지만 단순하게 UI만 바꿀일은 별로 없고, 이 UI가 하는 기능까지 잘 처리해줘야 한다.
MyCustomBackButton 추가
class MyCustomBackButton @JvmOverloads constructor(
context: Context, attrs: AttributeSet? = null
) : AppCompatTextView(context, attrs), View.OnClickListener {
private val cancelText: Int = R.string.pesdk_editor_cancel
private var stateHandler = if (!isInEditMode) {
StateHandler.findInViewContext(context)
} else StateHandler(context)
val uiStateMenu = stateHandler[UiStateMenu::class]
init {
setText(cancelText)
setOnClickListener(this)
}
@MainThread
@OnEvent(value = [UiStateMenu.Event.ENTER_TOOL, UiStateMenu.Event.LEAVE_TOOL, UiStateMenu.Event.LEAVE_AND_REVERT_TOOL], triggerDelay = 30)
protected fun onToolChanged() {
val currentToolData = uiStateMenu.currentStackData
val currentTool = currentToolData.toolPanel
if (currentTool.isAttached) {
visibility= if (currentTool.isCancelable)VISIBLEelseGONE
text=resources.getText(
if (currentToolData.panelData.id == MenuToolPanel.TOOL_ID) {
R.string.close_button
} else {
R.string.cancal_button
}
)
}
}
override fun onAttachedToWindow() {
super.onAttachedToWindow()
stateHandler.registerSettingsEventListener(this)
}
override fun onDetachedFromWindow() {
super.onDetachedFromWindow()
stateHandler.unregisterSettingsEventListener(this)
}
override fun onClick(v: View) {
if (UiStateMenu.MAIN_TOOL_ID == uiStateMenu.currentPanelData.id) {
uiStateMenu.notifyCloseClicked()
} else {
uiStateMenu.notifyCancelClicked()
}
}
}
Kotlin
복사
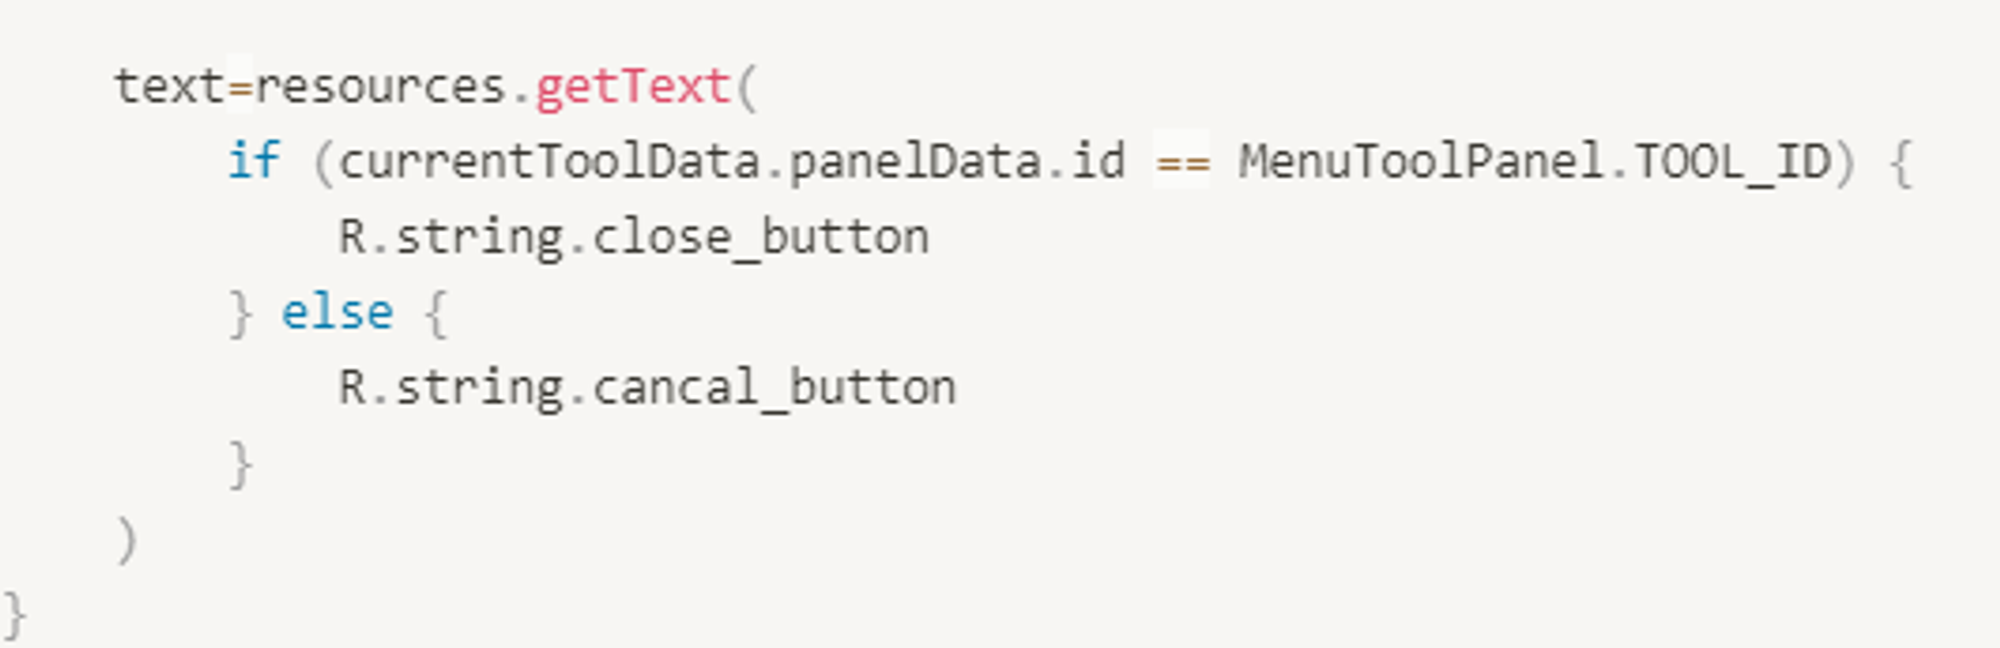
onToolChanged()를 보면 현재 기능이 선택된 상태이면 close를 아니면 cancel을 set 해주도록 되어 있다.
text = if (currentToolData.panelData.id == MenuToolPanel.TOOL_ID) {
"클로즈"
} else {
"캔슬"
}
Kotlin
복사
위와 같이 바꿔주자.
다시 imgly_widget_actionbar.xml
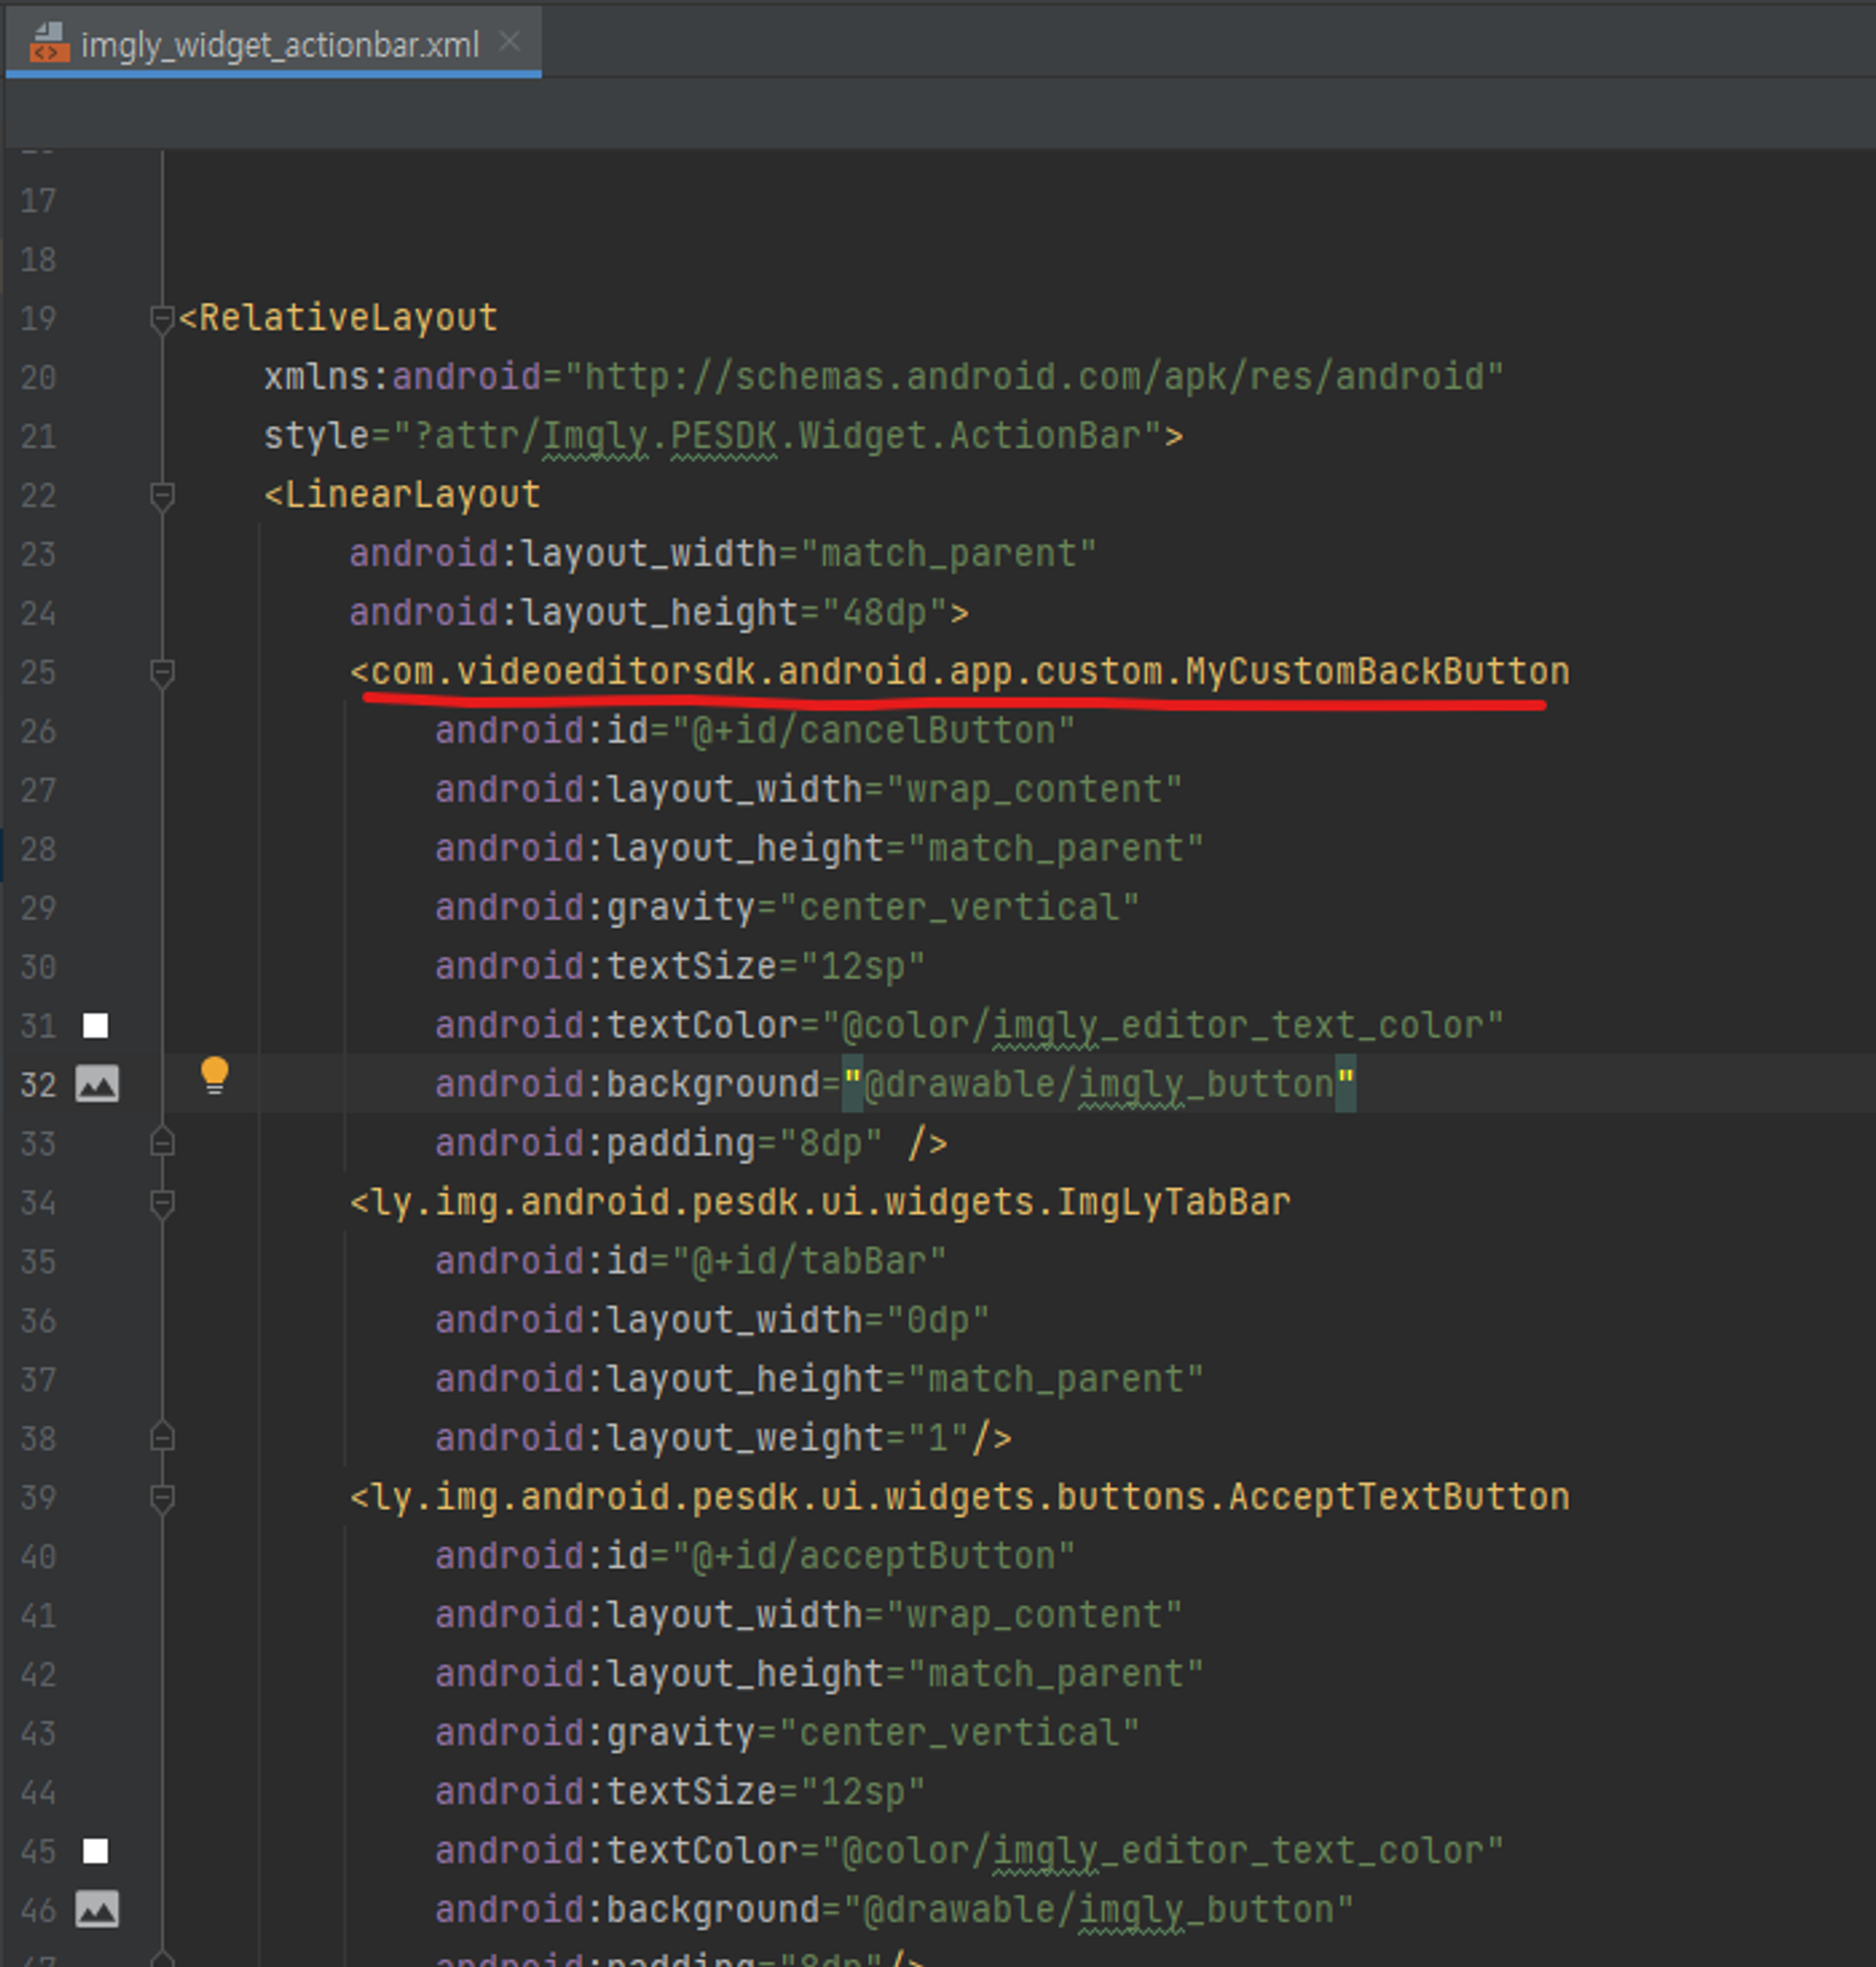
아까 가져온 imgly_widget_actionbar.xml의 CanelButton을 지금 만든 MyCustomBachButton으로 변경해준다.
결과


위와 같이 바뀐 것을 확인할 수 있다.
정리
•
default_res_files에서 가져온 layout 그대로 가져와서 필요한 부분만 변경하면 된다.
•
그 외 설정은 openEditor()에 settingsList 설정값을 주면 된다.